Ruby on Rails Tutorial. Let's Build: Basecamp With Ruby on Rails 5.1 - Part 4
16 November 2017
Introduction
We’ve setup the foundation of our project management application and now it’s time to implement a piece of functionality that will make it actually useful.
Live chat!
In Basecamp, this feature is known as Campfire and is used for casual communication within the team.
Let’s build it now.
Creating the Chat Room
Before we get too excited creating our Action Cable functionality, let’s first create the bones of how our chat room will look.
Here’s what you should do first:
- Create a new chat controller method, route and view.
- Put some dummy text on the view (don’t worry about functionality or styling yet, we’ll attack that in a moment).
- Link the “Campfire” button / card on the project home page to your new route.
If you’ve made it this far in the tutorial then you have the skills to to all of the above. Make it happen!

If the above is beyond you, fear not! Here’s what to do…
First, add your new controller method to your Projects Controller at app/controllers/project_controller.rb:
def chat
  @project = Project.find(params[:id])
end
Pop that action right below your existing “show” method or anywhere that makes sense for you (expect underneath the private section!).
Now your chat method is going to look for a view to render that is also called chat. Create that file at app/views/project/chat.html.erb and add some compelling dummy text:
<h1>Hello Chat!</h1>
Now all that’s left to do is to let our router know what we want. In your router file (config/routes.rb) add the details for your new chat method and route. The whole routes.rb file should now look like:
Rails.application.routes.draw do
  get 'projects', to: 'project#index'
  get 'projects/:id', to: 'project#show', as: 'project'
  get 'projects/:id/chat', to: 'project#chat', as: 'project_chat' # OUR NEW ROUTE!
  post 'projects', to: 'project#create'
end
Now if you were to navigate to localhost:3000/projects//chat, you’ll see our compelling new chat page!
Let’s link it up to our Campfire button from our project page by adding the correct link at app/views/project/show.html.erb:
<main class="container home">
  <h1 class="project-title text-center">
    <%= @project.name %>
  </h1>
  <div class="row">
    <%= render "feature_card", feature_link: project_chat_path(@project.id), title: "Campfire", img_src: "campfire", img_alt: "", description: "Chat with the group, ask questions and share stuff." %>

    # Lots of extra bits below this removed for the sake of clarity
As you can see above, we can simply add our link as an argument when we render our “feature_card” for our Campfire functionality!
Jump into your browser again and make sure that your link is working as it should before we make our chat room look like a chat room.
Let’s make it look like a chat room
Now that everything is linked up, let’s make our chat room look like a chat room.
A nice little UX feature that Basecamp has is an easy way to link back to the root project page from each individual feature which appears as a centered link at the top of each page. We’ll be using this little navigation helper for each feature (chat, to-do lists etc), so let’s create a partial view that we can re-use.
Create a new partial view called app/views/project/_project_nav.html.erb with the following markup:
<div class="project-nav">
  <p>
    <%= link_to @project.name, project_path(@project.id) %>
    <span>
      > <%= feature_name %>
    </span>
  </p>
</div>
This very simple view will display a link back to the root of our project and also display the name of the current page we’re on to help our users understand their location.
Render this view from our chat.html.erb view like so:
<main class="container home">
  <%= render "project_nav.html", feature_name: "Campfire" %>
</main>
And to make it look as it should, add this css to your app/assets/img/stylesheets/project.scss file:
.project-nav {
  text-align: center;
  font-size: 1.6rem;

  a {
    text-decoration: underline;
  }
}

Now let’s create the wrapper that will contain our sent messages as well as the form that we’ll be using to send the messages to our teammates.
Back in your chat.html.erb template, update it so that it mirrors the following code:
<main class="container home">
  <%= render "project_nav.html", feature_name: "Campfire" %>
  <div class="chat-wrapper feature-card">
    <div id="chat-contents" class="chat-contents">
    </div>
    <%= form_for @message, remote: true, url: "/messages", html: {id: "new-message-form", class: "chat-form"} do |f| %>
      <div class="form-group">
        <%= f.text_field :content, class: "form-control", id: "message-input", placeholder: "Say something riveting!", autoFocus: true %>
      </div>
    <% end %>
  </div>
</main>
We’ve added a chat-wrapper div that also borrows some styling from our feature-card class as well.
Below that we have an empty (for the moment) #chat-contents div where our messages will end up.
Below that, we have our new form that will create a message for us once we implement that functionality.
Before we move on, open up your app/assets/img/stylesheets/project.scss file once again and add the below to the bottom of that file:
.chat-wrapper {
  min-height: 80vh;
  display: flex;
  flex-direction: column;

  .chat-form {
    margin-top: auto;
  }
}
Refresh your chat page to see our nice white chat wrapper!
Dummy functionality
Before we implement our Action Cable functionality, let’s just implement functionality where we can save messages from our new chat form and then display upon creation. We’ll do this using the old-fashioned controller way.
Once we’ve implemented that, our Action Cable tie in will be incredibly easy!
I want you to take a moment and think about what’s required at this point. The functionality that we’re creating here is incredibly similar to what we implemented when we want to create a new project.
- There’s a form that we can submit (that contains our chat input).
- On submission we create a new
Message(yet to be implemented) record in a controller method . - Once the record is created, the controller return some JavaScript that is run on the client side.
And that’s it!
With that in mind, do your very best to create this functionality, leaning on the code you wrote earlier in this tutorial as a reference.
- You’re probably going got need a new
Messagemodel. - A
Messagebelongs_toaProject, right? - Does that then mean that a
Projecthas_manymessages? - How can we get the current project’s
idinto our controller action so that we know whichProjectwe’re creating aMessagefor?
Don’t get too sexy with the returned JavaScript either. Just append a new paragraph to our #chat-contents div for the time being.
Good luck!
It makes sense to generate our new Message model first, so let’s start there. Our messages should have content and also a project_id field so that we know which project it belongs to.
It’s also worth noting that messages will also belong_to a User at some point in the future, but as we haven’t implemented users yet, we’ll leave that for a future article.
Let’s generate our Message model in our terminal with a Rails generator:
bin/rails generate model Message content:text project:belongs_to
This will create a content column with a string type and a project_id column that will reference our project.
Migrate the generated migration with bin/rails db:migrate.
Last, but not least, add a line of code to your app/models/project.rb model that will let Rails know that a Project has_many messages:
class Project < ApplicationRecord
  validates :name, presence: true
  has_many :messages
end
You now have a working Message model you can play with!
Saving messages
Let’s create the functionality where we can save messages from our chat form and display the result in a very, very basic way.
To do that, we’re going to need a message_controller that will handle the creation of our messages along with the data we’ll receive on a successful or failed message creation.
Let’s lean on the Rails generators again to do so. In your terminal type and run:
bin/rails generate controller Message create
Which will create a message_controller with a single, empty create action.
Let’s have that create action save a message with a little touch of naive code:
def create
  @message = Message.new(message_params)

  if @message.save
    format.js
  end
end


private

  def message_params
    params.require(:message).permit(:content, :project_id)
  end
It’s worth noting here that our create action isn’t very secure or robust. We’re letting any user create any message for any project (the user could potentially submit any project_id that they want from the html form and we’re not handling errors at all, but it will do for the moment!
Now that we can create a new message, we’ll want to return a very simple snippet of JavaScript that will append our message to the message container in the chat view.
First, create the JavaScript file that will be returned in app/views/message/create.js.erb:
var chatContainer = document.getElementById('chat-contents')
var chatInput = document.getElementById('message-input')
var paragraph = document.createElement('p')

paragraph.innerHTML = "<%= @message.content %>"

chatContainer.appendChild(paragraph)
chatInput.value = ''
And give your new form a trial run!
It’s important to remember what’s happening here is not really what we want.
- Our form is working (yay) and our messages are being saved in the database.
- Upon successfully save of a message we’re only rendering the new message on our screen.
- If you were to refresh your page, you’ll lose all of your saved messages.
Let’s fix that last issue first and create some nicer looking messages at the same time!
How about you give it a go first?
- Make sure that a bundle of
@messagesare rendered when a user loads the page. - Try styling each individual message so that it looks nice! Use a partial view for each message and pass that view the content and
created_attime.
Do your best!
Let’s get those messages rendering first.
In your projects_controller’s chat action you’ll have to find your project’s messages and assign them to a @messages variable:
def chat
  @message = Message.new
  @messages = Message.where project_id: params[:id] # Let's find the messages for this project!
  @project = Project.find(params[:id])
end
Now if you were to iterate over the @messages in your chat.html.erb view, you’ll see all of your saved messages.
Before we do that though, let’s create a partial view for each individual message so that we can add some styling and not repeat ourselves.
Create a new partial view called message at app/views/message/_message.html.erb and add the following:
<div class="message-wrap is-owned">
  <div class="message-main-content">
    <div class="message-date">
      <%= time_ago_in_words message.created_at %>
    </div>
    <div class="message-content">
      <p><%= message.content %></p>
    </div>
  </div>
  <div class="message-user">
    <p>B</p>
  </div>
</div>
You’ll notice time_ago_in_words which is a handy Rails helper method we’ll be using to format our message’s created_at dates.
We’re also hard-coding the user’s intials at this point in time, which is fine! We’ll fix that up later!
One last thing to note about the above html is the extra class we have alongside message_wrap which is is_owned. Because we don’t have users implemented at the moment, we’re assuming that every single message is owned by us as we have no way of identifying if that is true or not for the time being. This is another thing we’ll adjust in the future!
Now that we have the html markup for our messages, let’s add some CSS to make it look nice!
Add the following to app/assets/img/stylesheets/message.scss:
.message-wrap {
  display: flex;
  flex-direction: row;
  max-width: 300px;
  margin-bottom: 16px;

  .message-main-content {
    border-radius: 6px;
    padding: 8px;
  }

  .message-content {
    p {
      margin-bottom: 0;
      text-align: right;
    }
  }

  .message-user {
    height: 25px;
    width: 25px;
    border-radius: 50%;
    background-color: #8067c3;
    align-self: center;
    display: flex;
    align-content: center;
    justify-content: center;

    p {
      text-align: center;
      align-self: center;
      color: #fff;
      margin-bottom: 0;
    }
  }

  .message-date {
    font-size: 0.8rem;
    text-align: right;
  }
}

.message-wrap.is-owned {
  margin-left: auto;
  justify-content: flex-end;

  .message-main-content {
    background-color: #eef9fc;
  }

  .message-user {
    margin-left: 8px;
  }
}
Even though we’re using the is-owned class for every message for the time being, we’ve broken it out into its own section to make our lives easier in the future.
Last but not least, you’ll need to let Rails know to render your messages using your new _message.html.erb partial view.
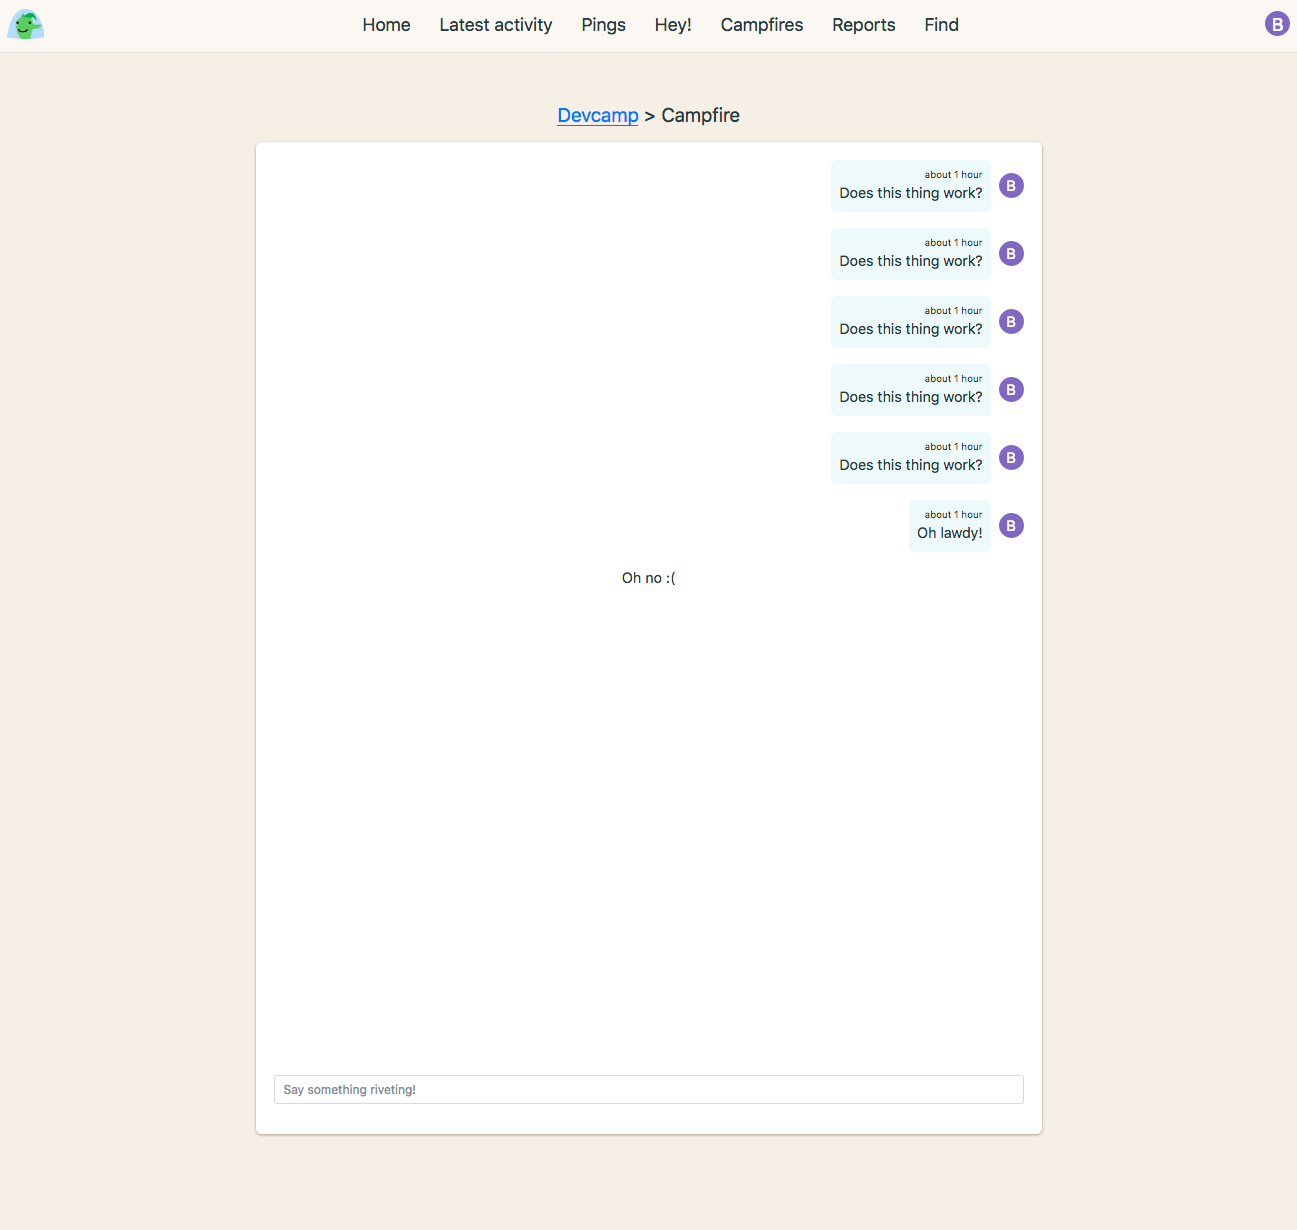
Refresh your chat page and look at your new styling!

Beautiful!
Prepare to be disappointed if you add a new message though, as we haven’t leveraged our new _message.html view yet!
Let’s fix that up now.
Open up the JavaScript file that we’re returning from our message_controller’s create action at app/views/message/create.js.erb and get it to utilise our lovely new message partial:
var chatContainer = document.getElementById('chat-contents')
var chatInput = document.getElementById('message-input')
var message = "<%= escape_javascript(render "message.html", message: @message) %>"
var div = document.createElement('div')

div.innerHTML = message

chatContainer.appendChild(div.firstChild)
chatInput.value = ''
If the above code seems similar, it’s because it’s pretty close to what we used when rendering our newly created projects earlier in this tutorial!
Test out your new messages and give yourself a massive high five. Make sure no-one is looking first because it’ll look really strange.
Migrating to Action Cable
You’re successfully creating new messages for a project, but our users will have to frantically refresh their browser page to have a chat-like experience. This probably isn’t a great user experience, so let’s make things real time by leveraging Action Cable.
The first thing we should do when setting up Action Cable functionality is to enable authorisation and make sure the current user should have access to the connection at all. We haven’t set up users or authorisation for our little app yet, so we’ll skip past this for the moment (this is important in real life though!).
What we’ll do first instead is create a new channel for our chat feature, which is the Action Cable equivalent of our controller.
We’ll call our channel ProjectChat and can use a Rails generator to set it up in our project. First, make sure you’re at the root of your project in your terminal of choice and then tap away on your keyboard until you have the following:
bin/rails generate channel ProjectChat
This generates a new project_chat_channel.rb file for us along with some client-side JavaScript that we’ll have to use to ensure that the client and server are connected properly via Websockets.
Check out the JavaScript that the rails generator created for us at app/assets/img/javascripts/channels/project_chat.js:
App.project_chat = App.cable.subscriptions.create('ProjectChatChannel', {
  connected: function () {
    // Called when the subscription is ready for use on the server
  },

  disconnected: function () {
    // Called when the subscription has been terminated by the server
  },

  received: function (data) {
    // Called when there's incoming data on the websocket for this channel
  }
})
To see if you’re getting a connection, you can add a console.log("We're connected!") line to the connected function above. Refresh your page and open your browser console and you should see your little message!
Now it’s great that we’re connected, but there are a few problems with our current implementation; People will connect to our ProjectChat channel even if they’re not in a project!
We can fix that by checking for the presence of a @project.id instance variable value in our application.html layout view and then assign that id to the browser window so that we can reference it later! It’s not as complex as it sounds.
In your app/views/layouts/application.html.erb file add the below just above your </body> html tag and under the <%= yield %> call:
<script>
  <% if @project.id %>
    window.projectId = "<%= @project.id %>";
  <% else %>
    window.projectId = null
  <% end %>
</script>
Now we can reference window.projectId in our project_chat.js file!
Jump back into app/assets/img/javascripts/channels/project_chat.js and update the file like so:
document.addEventListener('turbolinks:load', function () {
  if (window.projectId) {
    App.project_chat = App.cable.subscriptions.create(
      {
        channel: 'ProjectChatChannel',
        room: window.projectId
      },
      {
        connected: function () {
          console.log("Hello Channel!")
          // Called when the subscription is ready for use on the server
        },

        disconnected: function () {
          // Called when the subscription has been terminated by the server
        },

        received: function (data) {
          // Called when there's incoming data on the websocket for this channel
        }
      }
    )
  }
})
You’ll notice that we’re checking for the window.projectId value and if it exists, we’ll create a subscription to the correct channel and room. The room we’re joining simply uses the project id for the project.
At this point we have a valid connection over web sockets and if you refresh your chat page, you should see a “Hello Channel!” message in your browser console. Now that we’re connected, we can implement our chat functionality.
The first thing we need to do is create the client-side functionality that will let us send a message to our channel on the server-side.
In the same project_chat.js file, we’ll add a few things:
- We’ll identify the message form, message input and the message container (where the messages will be rendered) and assign them to variables.
- We’ll make sure that we also have our
messageFormpresent before we connect to our channel. - We’ll add an event listener for our form that will trigger the sending of our new message, the clearing of our form input and also preventing the standard form submit action (which would refresh your page!).
Here’s what that looks like:
document.addEventListener('turbolinks:load', function () {
  const messageForm = document.getElementById("new-message-form")
  const messageInput = document.getElementById("message-input")
  const messageContainer = document.getElementById("chat-contents")

  if (window.projectId && messageForm) {
    App.project_chat = App.cable.subscriptions.create(
      {
        channel: 'ProjectChatChannel',
        room: window.projectId
      },
      {
        connected: function () {
          // Called when the subscription is ready for use on the server
        },

        disconnected: function () {
          // Called when the subscription has been terminated by the server
        },

        received: function (data) {
          // Called when there's incoming data on the websocket for this channel
        },

        sendMessage: function (content) {
          this.perform('send_message', { content: content, project_id: window.projectId })
        }
      }
    )

    messageForm.addEventListener('submit', function (e) {
      e.preventDefault()
      App.project_chat.sendMessage(messageInput.value)
      messageInput.value = ''
    })
  }
})
Something else that you’ll notice is that we’ve created a new sendMessage function that will allow us to send our message via web sockets. The function accepts only one argument (content) and we send it along with the project_id of the current project to the server side.
Before we move on, we’ll remove the remote: true and url option from our message form in app/views/project/chat.html.erb. This will leave us with a form that just looks like this:
<%= form_for @message, html: {id: "new-message-form", class: "chat-form"} do |f| %>
  <%= f.hidden_field :project_id, value: @project.id %>
  <div class="form-group">
    <%= f.text_field :content, class: "form-control", id: "message-input", placeholder: "Say something riveting!", autoFocus: true %>
  </div>
<% end %>
We can remove those fields as we’re handling the form’s functionality from our project_chat.js file.
The first part of our Action Cable functionality is complete! We’re collecting the data we need from the browser and sending it to the server via websockets. Now it’s time to work our magic from the server-side!
In the above code snippet, take note of the first argument we’re passing to this.perform(). The send_message string will tell Rails what to call from the server side and this is where we’ll perform our message saving and the logic to ‘broadcast’ our new message to all of the other subscribers of our channel (those who are also on the project’s chat page).
Open up the channel file at app/channels/project_chat_channel.rb and you should see the below:
class ProjectChatChannel < ApplicationCable::Channel
  def subscribed
    # stream_from "some_channel"
  end

  def unsubscribed
    # Any cleanup needed when channel is unsubscribed
  end
end
First things first, we have to add some code to our subscribed method so that our users will start streaming data that is broadcast (we’ll do this in a bit) on this channel. We’ll lean on our project id when updating our subscribed method:
def subscribed
  project = Project.find(params[:room])
  stream_from "project_channel_#{project.id}"
end
So if a user is subscribed to the Project Chat Channel, and we broadcast something to the project_channel_#{project.id}, they’ll receive that data in their browser!
Now remember, how we used send_message as a string identifier for our message? Let’s create that method in our ProjectChatChannel file now.
class ProjectChatChannel < ApplicationCable::Channel
  def subscribed
    project = Project.find(params[:room])
    stream_from "project_channel_#{project.id}"
  end

  def unsubscribed
    # Any cleanup needed when channel is unsubscribed
  end

  def send_message(data)
    project_id = data["project_id"]
    content = data["content"]

    message = Message.create!(content: content, project_id: project_id)
    ActionCable.server.broadcast("project_channel_#{project_id}", message: render_message(message))
  end

  private

    def render_message(message)
      MessageController.render partial: 'message/message', locals: {message: message}
    end
end
Let’s step through this step by step.
- Our
send_messagemethod receives one argument, our data. This is the data we passed to it from our JavaScript we wrote above (the content and the project_id). You can always inspect the data usingputs datawithin thesend_messagemethod if you want to check it out. - We assign our
project_idandcontentdata to variables from thedatahash that we’ve received. - We create a new message using our content and project id.
- Once created, we broadcast a rendered message back do the subscribers of our channel.
- The rendered message is created in our private
render_messagemethod. This lets us use our_message.html.erbpartial to return to the client.
And that’s it!
OK, so we’ve got the client sending data to the server and we have the server saving that data as a new message and then broadcasting that message to the channel’s subscribers.
Now it’s time to handle the broadcast message back on the client-side!
Think of this communication as a loop:
- Client performs an action which is handled with JavaScript.
- Server side does something and broadcasts a response to all subscribers.
- Client receives the response and we use JavaScript to determine what happens to this response.
So let’s go back to the client side and re-open our app/assets/img/javascripts/channels/project_chat.js file. Within this file, it’s the received() function that is called when the client-side receives data.
Remember, you can just pop a console.log(data) in your function to inspect what’s being returned if you get lost!
Now, in our received function, we’ll:
- Transform our returned message into something we can render on the browser.
- Append our new message to our message container!
Here’s the whole project_chat.js file with the updated received function:
document.addEventListener('turbolinks:load', function () {
  const messageForm = document.getElementById("new-message-form")
  const messageInput = document.getElementById("message-input")
  const messageContainer = document.getElementById("chat-contents")


  if (window.projectId && messageForm) {
    App.project_chat = App.cable.subscriptions.create(
      {
        channel: 'ProjectChatChannel',
        room: window.projectId
      },
      {
        connected: function () {
          // Called when the subscription is ready for use on the server
        },

        disconnected: function () {
          // Called when the subscription has been terminated by the server
        },

        received: function (data) {
          var messageNode = document.createElement('div')
          messageNode.innerHTML = data.message
          messageContainer.appendChild(messageNode)
        },

        sendMessage: function (content) {
          this.perform('send_message', { content, project_id: window.projectId })
        }
      }
    )

    messageForm.addEventListener('submit', function (e) {
      e.preventDefault()
      App.project_chat.sendMessage(messageInput.value)
      messageInput.value = ''
    })
  }
})
Your chat functionality should be working like a dream at this point. Open the chat page in two browser windows and be amazed at what you’ve created.
Wrapping Up
Now that the send_message method is handling the saving of your new messages, you can actually delete the contents of your app/controllers/message_controller.rb, leaving you with:
class MessageController < ApplicationController
end
This controller is no longer the recipient of any requests!
The app/views/message/create.js.erb file is no also redundant, so feel free to delete that as well.
Another thing worth tidying up from the last article is the way we handled our turbolinks:load event in our app/assets/img/javascripts/project.js file. Let’s move that listener out so that it fires before we check for the new-project-form.
I was getting errors when trying to create new projects without doing the above!
Now, there are a few issues with what we’ve created for our live chat, which are worthwhile not doing on a real app.
- No authentication! This means that all messages are anonymous and appear on the right side of the screen.
- We should use Rails jobs to handle the queuing of messages to be sent back to our users. When DHH created a Action Cable video tutorial upon the release of Action Cable, he does exactly this.
- There’s no error handling in our
send_messagemethod when we create our message. This is bad practice!
But hey, we got our chat room working and that’s good enough for the moment!
Until next time,
Ben