Let's Build: Instagram (Test Driven with Ruby on Rails) - Part 1
07 July 2015
A story that perfectly explains the importance of testing.
Staring down from Mount Awesome, wielding your brand new application in hand, you start striding down to the nearest township of Productiononia. You feel confident, you’ve added a few more gems to the pommel of your application and you’ve refactored your blade until it’s sharp to the touch. Sure it’s your MVP and it’s a bit rough in parts but people will flock to you, you just know it
Strutting confidently into Productiononia you’re stunned to discover that everyone is laughing and pointing as you walk by. Confused and worried, you run to a butchers shop (fiverr.com) to look at your reflection in their window.
You realise you’re completely naked and the application in your hand is completely broken.
You didn’t test.
So let’s not be naked together and build applications that we know work well.
With that incredible tale lingering at the forefront of your cranium, let me explain how this guide’s going to work.
We’ve already built this application cowboy style over here with not a test to be seen and to be honest, I kind of think you should read that first, just so you know the in’s and outs of what we intend on building.
In this article though, you’ll be basking in the glory that is behaviour driven development with Ruby and Rails using some super popular tools.
Oh yeah, in case you refuse to click my links, this is what we’re building:
A blatant Instagram knock-off.
In this version of the guide I’m going to help you write specs for specific features and then help you work your way through the errors until the feature is complete. The great thing about having written the previous guide, is that you should already kind of know your way around the app!
Wait… why is that good?
Because it’ll mean the error messages that are at the core of Behaviour Driven Development will make more sense to you and therefore mean you can actually fix those errors!
Oh and another thing. I’m only going to tell you the detailed path through the errors for the first part only. I’ll give you hints for the other parts but I want you to refer back to the original post when you run into an error. I want you to interpret that error and take the next step to get one step closer to a passing test!
Images and Visions
You’re going to see this image often throughout the guide:

When you see this, I want you to try to build / fix / create that feature / step / solution yourself before you read my solution.
You’re also going to see this symbol:

Which means you should commit your changes to git. I discussed this over in the first article too.
Let’s start building!
A quick start
First create your rails project where you desire.
Jump on in your terminal and write the following:
rails new Photogram
And that’ll do for the moment!
Before we get too excited, let’s get our app ready for testing in the way employers like (the methods also happen to be just generally great). We’re going to use RSpec, Capybara and FactoryGirl in this guide due to their popularity within the community.
Install rspec-rails as per their docs.
All done? Have the gem in your gemfile? Great. Did you run the generator? Good, good.
Now, do the same with capybara as per their docs.
Basically, just include the gem in your gemfile.rb and add the line require 'capybara/rails' to your rails_helper.rb file.
Last but not least, factory_girl!
Include the gem and we’ll create our first factory a little later.
Instagram 101. Lovely things to look at.
To start with, let’s build out the ability to create posts, a core function of our app. Each post will have a caption and an image. Let’s first think about how this feature will work via pseudo-code.
The way I want to implement the creation of posts (and the display of them) is shown below:
# visit the root route
# click on a button to create a new post
# fill out the bits of the form that we need.
# click the submit button
# expect the page that we’re sent to to have specific text
# expect the page to contain our photo.
I’m going to write this first test for you so you get a taste for it. Create a new folder in your application’s /spec/ folder called features. Then in /spec/features/ create a new file called creating_posts_spec.rb.
In that file, tap on your keyboard until the following code appears:
require 'rails_helper.rb'

feature 'Creating posts' do
  scenario 'can create a post' do
    visit '/'
    click_link 'New Post'
    attach_file('Image', "spec/files/images/coffee.jpg")
    fill_in 'Caption', with: 'nom nom nom #coffeetime'
    click_button 'Create Post'
    expect(page).to have_content('#coffeetime')
    expect(page).to have_css("img[src*='coffee.jpg']")
  end
end
How easy is that to read! It’s just like the pseudo code we wrote! If this stuff is new to you, make sure this sinks in (you’ll be doing it yourself for the next test!). This is the combination of RSpec and capybara at work.
One quick thing, you’ll need to have that image file ready to use at that path. Create the files/images folder and add a jpg image called coffee or just adjust the test to accept an image file of your choosing!
As for the actual running of the test, you have some options. In the root folder of your application you can run all tests in your spec folder with the rspec command in your terminal. You can also run an individual test with the rspec command and the specific path, say:
rspec /spec/features/creating_new_posts_spec.rb
For the moment, just use the command rspec in the terminal, we only have one test after all.
Run RSpec now with the command of your choice.
Our first error! How wonderful!
Failures:

  1) Creating posts can create a post
     Failure/Error: visit '/'
     ActionController::RoutingError:
       No route matches [GET] "/"
No route matches ‘/’ eh? We’ll see about that! Do you remember what we did in the original article to create our root route? Do that now. I’ll give you a hint, it’ll involve creating a controller for our posts, creating an action to use as our root route and then adding that root route to our routes.rb file.
Let’s go through it step-by-step.
First, we need our root route to actually point to something. That something should be our index action in our soon to come into existence posts controller.
Generate the posts controller in your terminal now.
C’mon, you didn’t even refer to the last article, did you!?!
Run the below in your terminal
bin/rails g controller posts
Nice.
Now navigate to your new posts_controller.rb file and create an empty index action within that controller.
Remember it needs to be empty… just like my heart…
def index
end
We’re going to need to create a view for this controller action. Within app/views/posts/ create a new file called index.html.erb OR index.html.haml. I’m personally going to use haml from now on so you may have to translate (it’s super easy). If you decide to use haml, you’re going to have to install the gem in your gemfile and run the bundle command in the terminal. Haml docs are here.
Within that new view file, I’m just going to create a h1 tag with the word “Photogram”.
My index.html.haml file at this point looks exactly like this:
%h1 Photogram
Last but not least, to get past this error, we need to point our root route to this index action. Jump into your config/routes.rb file and point your root route to your index!
Alright, let me show you.
In your routes.rb file include the following:
root 'posts#index'
Run rspec in terminal again.
Alas, a new error! Isn’t this fun?
Failures:

  1) Creating posts can create a post
     Failure/Error: click_link 'New Post'
     Capybara::ElementNotFound:
       Unable to find link "New Post"
The errors are telling us exactly what to do! Let’s create a new link… but wait, that button is going to have to point to something….
How about we create the link first and see what happens. Use the link_to method and point to what will be the new_posts_path.
link_to? Who are you? Are you coo?
Below your h1 tag, add the following:
= link_to "New Post", new_post_path
I’m so sorry about that rhyme.
Re-run rspec in terminal.
And:
1) Creating posts can create a post
   Failure/Error: visit '/'
   ActionView::Template::Error:
   undefined local variable or method 'new_post_path' for #<#<Class:0x007fe0771a0388>:0x007fe0771bb368>
Oh yeah, we don’t have any of the routes in our posts controller identified! Add them now to your routes.rb file by using Rails RESTful resource routing.
In routes.rb, add:
resources :posts
Re-run rspec!
This is what we reveal:
Failures:

  1) Creating posts can create a post
     Failure/Error: click_link 'New Post'
     AbstractController::ActionNotFound:
       The action 'new' could not be found for PostsController
No action ‘new’ in our PostsController? No problemo. In fact, I think you can fix that yourself. In your posts controller create a new, empty, new action.
Show me, I don’t trust my own brain.
You should, it’s a nice brain. The empty new action in your posts controller should look like this:
def new
end
RSPEC TIME!
And the next error claims that there’s no template! You know how to fix that! Create a new template for your ‘new’ action now. It’s exactly the same process we used for our index view. Leave it empty for the moment.
In app/views/posts create a new.html.haml or new.html.erb file.
RUN THAT RSPEC COMMAND
And we’re hit with this:
Failures:

  1) Creating posts can create a post
     Failure/Error: attach_file('image', "spec/files/images/coffee.jpg")
     Capybara::ElementNotFound:
       Unable to find file field "image"
Of course it fails, we don’t have a form! Let’s install the simple_form gem by following their docs. If you’re not sure how to setup simple_form, read part one again!
All done? Alright, as per their docs, let’s create our (simple) form.
In your new view, add the following:
= simple_form_for @post do |f|
  = f.input :image
  = f.input :caption
  = f.button :submit
__
And now it’s…
RSPEC TIME!
And we get:
Failures:

  1) Creating posts can create a post
     Failure/Error: click_link 'New Post'
     ActionView::Template::Error:
       undefined method 'model_name' for nil:NilClass
Yep. We have no model to store out data in! Not only that, that instance variable we created doesn’t actually exist in our controller…
Let’s fix these issues now.
First, create your Post model.
In your terminal tap away the following code. We aren’t going to include the image for our posts yet and I’ll explain why in a moment. (Spoiler: We’re going to use the Paperclip gem).
bin/rails g model Post caption:string
And shortly after, once your terminal stops doing it’s thing, migrate your database. You know how.
Don’t know how?
You aren’t reading my articles are you? Run the following in your terminal.
bin/rake db:migrate
Now let’s take care of that pesky instance variable that’s holding up our progression. Are you noticing how BDD is like a guide in itself? It tells you what to do, you just have to interpret the errors!
Head on back to your posts_controller.rb file and add an instance variable called @post in your new action that gives us an object to base our form fields on.
You just need to believe in yourself…
def new
  @post = Post.new
end
AND IT’S RSPEC TIME!
Failures:

  1) Creating posts can create a post
     Failure/Error: click_link 'New Post'
     ActionView::Template::Error:
       undefined method 'image' for #<Post:0x007f8bbe34dcc0>
No image method eh? Makes sense considering we’ve only added a caption column so far for our model. Let’s go through installing the paperclip gem, a great gem for handling image uploading. Read the docs before you get too excited.
Do your best to go through the process of installing Paperclip yourself and including an image field in your Post model. You should be ok if you’ve read the non-tested version of this guide.
Read your articles Ben? Over my dead body!
Wow, that’s harsh. I guess I’ll explain the process here…
First things first, as per the docs, you’ll need imagemagick running on your development computer. Set it up as per the instructions here.
Next we’ll add the paperclip gem to our gemfile as per their docs.
gem 'paperclip', '~> 4.2' # at the writing of this post
Run bundle in your terminal to install the new gem.
Read the next bit of the docs, what does it ask you to do now?
I can’t read well.
But this is a written article too? Let’s add has_attached _file to our Post model. I’m going to specify a max width of the image and validate the attachment as per the docs too.
class Post < ActiveRecord::Base
  has_attached_file :image, styles: { :medium => "640x" }

  validates_attachment_content_type :image, :content_type => /\Aimage\/.*\Z/
end
As per the docs you’ll also need to run the rails migration generator in your terminal with:
bin/rails g paperclip post image
Last but not least, migrate your database with:
bin/rake db:migrate
How good are these docs!
Alright, we’ve now got paperclip ready to use on our Post model and we’ve got the ability to add captions to our selfies and cat pics.
Restart your rails server if you have it running at this point. It’ll get upset otherwise.
RSPEC THYME!
Failures:

  1) Creating posts can create a post
     Failure/Error: click_button 'Create Post'
     AbstractController::ActionNotFound:
       The action 'create' could not be found for PostsController
Fair enough. Let’s create a create action in our controller that actually creates a new post!
Add the following to your posts controller:
  def create
    @post = Post.create(post_params)
  end

  private

  def post_params
    params.require(:post).permit(:caption, :image)
  end
This should make sense. We’re just defining the parameters we’ll accept with the private post_params method. We’re then creating a new Post object using those post_params.
RSPEC TIME!
Failures:

  1) Creating posts can create a post
     Failure/Error: click_button 'Create Post'
     ActionView::MissingTemplate:
       Missing template posts/create, application/create with {:locale=>[:en], :formats=>[:html], :variants=>[], :handlers=>[:erb, :builder, :raw, :ruby, :coffee, :haml, :jbuilder]}. Searched in:
         * "/Users/ben/Desktop/dev/Photogram_TDD/app/views"
It seems Rspec is taking issue with us not having a template for our create action, but we don’t really want one… We simply want the create action to redirect the user somewhere else once it’s done it’s thing. Add a redirect_to line to your create action where you redirect the user to that specific post after completion.
My solution is below. Rails knows that the @post in this scenario is our newly created post!
def create
  @post = Post.create(post_params)
  redirect_to @post
end
RSPEC RUNNING TIME
And our new failure is:
Failures:

  1) Creating posts can create a post
     Failure/Error: click_button 'Create Post'
     AbstractController::ActionNotFound:
       The action 'show' could not be found for PostsController
We should know how to make an action in our controller by now. Create a show action now that references the id of the specific post.
def show
  @post = Post.find(params[:id])
end
RUN ARRRRR SPEC!
Failures:

  1) Creating posts can create a post
     Failure/Error: click_button 'Create Post'
     ActionView::MissingTemplate:
       Missing template posts/show, application/show with {:locale=>[:en], :formats=>[:html], :variants=>[], :handlers=>[:erb, :builder, :raw, :ruby, :coffee, :haml, :jbuilder]}. Searched in:
         * "/Users/ben/Desktop/dev/Photogram_TDD/app/views"
You know what to do right? Create a new view for our show action!
As per usual I’m going to haml it up. In my posts/views folder I’m going to create a new file called show.html.haml.
Try to get some logic in that view to display our new image and caption. My version is below.
= image_tag @post.image.url(:medium)
= @post.caption
I’ve used the Rails’ image_tag helper to actually display the image, rather than just show the url (which is what would happen if we just called @post.image).
YOU’D BETTER RUN RSPEC AGAIN BECAUSE…
HOLY HEINEMEIER HANSSON OUR FIRST PASSING TEST!
Huzzah!
Whilst this is a glorious moment, there are a few pending tests that are taking the edge off our glorious victory. Delete the spec/helpers/posts_helper_spec.rb and spec/models/post_spec.rb files for the moment.
If you were to re-run rspec in your terminal now you’ll notice it’s a glorious green colour. This is a much better reflection of how good I feel about myself at this moment.
And that’s our first taste of behaviour driven development! Whilst this is fantastic, I want to quickly write another test that ensures our users need to include an image when posting. This is an image sharing site after all…
Let’s write another test under our original. Pseudo code incoming:
it 'needs an image to create a post' do
  # visit root route
  # click the 'New Post' link
  # fill in the caption field (without touching the image field)
  # click the 'Create Post' button
  # expect the page to say, "Halt, you fiend! You need an image to post here!"
end
Using your new-found Rspec powers, write a test for the above pseudo-code. Refer to your last test as required.
You did it yourself didn’t you! I knew you could do it!
Here’s my version just incase you don’t completely trust yourself.
it 'needs an image to create a post' do
  visit '/'
  click_link 'New Post'
  fill_in 'Caption', with: "No picture because YOLO"
  click_button 'Create Post'
  expect(page).to have_content('Halt, you fiend! You need an image to post here!')
end
Run that bad boy in your terminal with your rspec command of choice.
RSPEC RSPEC RSPEC
We are faced with this:
Failures:

  1) Creating posts needs an image to create a post
     Failure/Error: expect(page).to have_content("Halt, you fiend! You need an image to post here!")
       expected to find text "Halt, you fiend! You need an image to post here!" in "No picture because YOLO"
Hmm, so we’re neither stopping the post from being created AND we’re also not getting any sort of error message…
Let’s stop them from posting first and then we’ll alert them.
In your Post.rb model file, add a validation that requires the image field to be present.
Compare your validation in your Post.rb model to mine below:
class Post < ActiveRecord::Base
  validates :image, presence: true

  has_attached_file :image, styles: { :medium => "640x" }

  validates_attachment_content_type :image, :content_type => /\Aimage\/.*\Z/
end
Run your test again to see what it’s complaining about now.
ARRRRR SPEC
Failures:

  1) Creating posts needs an image to create a post
     Failure/Error: expect(page).to have_content("Halt, you fiend! You need an image to post here!")
       expected to find text "Image Required" in "Photogram New Post"
Oh, we’re just being redirected to the index page. That’s not ideal. Let’s add some logic to our controller that adjusts the redirections and messages based on what’s happening to the user.
If the user’s post is saved, let them know about it and redirect them to the post itself. If the post hasn’t saved for whatever reason, give them the message we want above and render the new path.
If and else, my good friends. Our create action within the controller can now look like this:
  def create
    @post = Post.create(post_params)
    if @post.save
      flash[:success] = "Your post has been created."
      redirect_to @post
    else
      flash[:alert] = "Halt, you fiend! You need an image to post here!"
      render :new
    end
  end
But wait! We need to make sure our views are going to display these flash messages. I’m going to show these by adding some code to my application.html.haml under /layouts/ and also adding a helper for the sake of these flash messages. These will be especially useful for when we install Bootstrap and add some styling later :)
Add the following code to your application.html.haml file just below the body tag.
-flash.each do |name, msg|
  = content_tag :div, msg, class: [:alert, alert_for(name)]
Notice the alert_for method here? We’ll have to implement that in our application_helper.rb file under app/helpers.
module ApplicationHelper
  def alert_for(flash_type)
    {
        :success => 'alert-success',
        :error => 'alert-danger',
        :alert => 'alert-warning',
        :notice => 'alert-info'
    }[flash_type.to_sym] || flash_type.to_s
  end
end
Ok, we’ve implemented the logic in our controller and added the ability to display our flash messages in our views. Rerun your tests now.
ARRR SPEC
Another passing test! My favourite thing :)
Give the person beside you a high five because you deserve it. If there’s no-one there, give me a high five through your monitor. Don’t leave me hanging.
You’re getting better at writing tests and you’re starting to understand what the error messages mean, meaning you can fix them!
The rest of this article is going to be a bit different though. I’m going to give you the tests to run and I want you to attempt to fix the errors yourself. The reason you should be able to do this is because you’re going to open my non-TDD article in a different window and that’ll help you flesh out the functionality to get some passings tests!
It’s time for a stream of pure beauty (i.e. a decent index.)
For your first challenge, I want you to build an index for our application that shows a stream of all of the records in the Post model.
BUT FIRST!
This is a great time for me to quickly explain factories.
Factory_girl is a great gem that let’s you create active record objects to test against. Let’s set it up now.
First, install the gem in your gemfile and run bundle in your terminal.
gem "factory_girl_rails", "~> 4.0"
Now, add the following line to your rails_helper.rb file within the Rspec.configure block:
config.include FactoryGirl::Syntax::Methods
Now we can create our first default factory for our posts. Create spec/factories/post.rb and build your first factory with the below code:
FactoryGirl.define do
  factory :post do
    caption "nofilter"
    image Rack::Test::UploadedFile.new(Rails.root + 'spec/files/images/coffee.jpg', 'image/jpg')
  end
end
You’ll have to include an image at that path and make sure the name matches what you use in your factory file, I assure you that the use of coffee.jpg is completely optional. Alright my friend, we officially have a factory!
What now, you ask? Why we write our test for the index!
Here’s some pseudo code for what features I’d like my index to have.
# Create multiple posts using factories.
# User visits the root route.
# User can see the comments and images of the posts we’ve created.
Simple huh? We’ll call this feature test displaying_index_posts_spec.rb and we’ll place it within the features folder.
Using the past few tests we’ve written as guides, try to create the viewing posts test.
This is how I’ve written the test, notice the use of factories to create posts at the top.
require 'rails_helper'

feature 'Index displays a list of posts' do
  scenario 'the index displays correct created post information' do
    post_one = create(:post, caption: "This is post one")
    post_two = create(:post, caption: "This is the second post")

    visit '/'
    expect(page).to have_content("This is post one")
    expect(page).to have_content("This is the second post")
    expect(page).to have_css("img[src*='coffee']")
  end
end
Run your test meow.
RSPEC TEST TIME
This is what we’re presented with:
Failures:

  1) Can see a list of posts lists all posts
     Failure/Error: expect(page).to have_content("This is post one")
       expected to find text "This is post one" in "Photogram New Post"
So were simply not being presented with our posts… I guess this makes sense considering our index view at the moment is completely static!
Your challenge, if you choose to accept it, is to implement the code that will allow us to see a list of posts on our index. Remember, if you can’t do it on your own, look at my first, non-test-driven post right here.
No, seriously, it’s up to you now, there are no secret hints here! Refer to the last article if you need and build the features yourself! When you’re all done, continue to the next feature below, being able to edit your posts.
Keep in mind how BDD works though. Build only what’s needed to get the current error passing and then re-test. Continue until the feature is complete!
Showing individual posts
Although we kind of implemented this feature in our original creating_posts_spec, I want to test it anyway. This test will be a little different in that I want to be able to click on a posts’ image in the index and have it take me to the show path of that individual post.
Here’s our test in pseudo-code:
# create a post with factory_girl
# visit '/'
# click on an image link
# expect to be taken to the show page of our post
Wonderful. I want you to write this spec yourself. Right………… now!
Even though I know you did a wonderful job, I want to share my version.
require 'spec_helper'

feature 'Can view individual posts' do
  scenario 'Can click and view a single post' do
    post = create(:post)

    visit '/'
    find(:xpath, "//a[contains(@href,'posts/1')]").click
    expect(page.current_path).to eq(post_path(post))
  end
end
Now go forth and run:
RSPEC!
And now… it’s up to you to get this spec passing. Good luck friend.
I must edit, for I have made a terrible mistake.
You sure have! I can’t believe you did that thing you did!
Let’s write some pseudo-code together to think about this spec we’re going to write.
# create a post with factory_girl
# visit the root route
# click the image of the post we created with factory_girl
# click the 'edit post' link
# fill in 'Caption' with "Oh god, you weren’t meant to see this picture!"
# click the ’Update Post’ button
# expect the page to have content saying "Post updated hombre."
# expect the page to have content saying “Oh god, you weren’t meant to see this picture!”
Yeah, it’s a bit long but it’s pretty obvious what we’re trying to achieve here. Using your ever expanding knowledge to build out this spec by yourself. Call the spec, editing_posts_spec.rb and plop it in your spec/features/ folder.
I believe in you, you big, beautiful apprentice developer.
Hey, I believed in you! Oh, you’re just checking? Good, good.
require 'rails_helper'

feature 'Editing posts' do
  background do
    post = create(:post)

    visit '/'
    find(:xpath, "//a[contains(@href,'posts/1')]").click
    click_link 'Edit Post'
  end
  scenario 'Can edit a post' do
    fill_in 'Caption', with: "Oh god, you weren't meant to see this picture!"
    click_button 'Update Post'

    expect(page).to have_content("Post updated hombre")
    expect(page).to have_content("Oh god, you weren't meant to see this picture!")
  end
end
Oooooh, there are a few differences there aren’t there? Well kinda.
First, we’re using a background block to perform some actions that might be repeated over multiple tests prior to the specific actions required for each scenario. Using this block is an excellent way of not repeating ourselves over multiple tests within the same spec.
Think back to our first spec creating_new_posts_spec.rb. Both tests within that spec had us visiting our root route and clicking the “new post” link. We could replace those actions with a single background block that does that exact same thing!
Genius!
The next little trick is that we’re finding a element within our index that contains the path for the post we created with factory_girl and clicking it using capybara. This is a simple way for replicating how we want our application to behave for an actual human being. It looks a little messy simply because it’s a bit tricky to find the exact element to click on when using an image.
Guess what? It’s your turn again.
We’ve built the editing feature before in the original article over here so run your test, fix what it’s complaining about and run it again until you see your terminal glowing in beautiful green passing tests.
I’ll give you a hint on how to start. Run your test and it’ll complain that the ‘element is not found’ when referring to our href path on the index. Do you think that’s because we haven’t set up our images on the index to be a link to the ‘show’ action yet? Hmmm…
For that matter, even once we click that image and it takes us to the ‘show’ page for our post, does it contain an ‘Edit Post’ link? I don’t think so…
Good luck friend!
Only read this part once your original edit spec is working.
Let’s create a new spec under the existing spec in editing_posts_spec.rb. This test will make sure that the user get’s a message if they’re naughty and try to edit / update their post without an image, which we really want (as per our new / create actions and test).
Let’s think this through with pseudo-code (remember we don’t need to repeat the actions in the background block in this spec:
# starting after the actions in the background block:
# fill in the 'Image' field with nothing
# click the 'Update Post' button
# expect to see the message: 'Something is wrong with your form!'
Write the spec now!
First, we’ll try to update a file that isn’t an image. I’ve created a dummy zip file for this example but you can use something else if you wish.
it "won't update a post without an image" do
  attach_file('Image', 'spec/files/coffee.zip')
  click_button 'Update Post'

  expect(page).to have_content("Something is wrong with your form!")
end
Go ahead and make this feature work now. Refer back to the original post and the new/create action in your current controller. Those actions behave in a very similar way.
Once you’ve built this latest feature, continue on to the last part of the guide, creating the ability to delete your posts.
When editing isn’t enough, one must destroy all evidence
You’ve done it again. You’ve ‘accidentally’ posted a picture of your washboard abs and glutes only to realise your boss follows you on Photogram. Classic you mistake.
Let’s fix it now by first writing a test. Here’s the pseudo-code version.
# create an example post using factory_girl
# visit the root route
# click on the image to 'show' the individual post
# click on the 'Edit Post' button to enter the edit view
# click on the 'Delete Post' button
# expect to be routed to the root again.
# expect to see the message "Problem solved!  Post deleted."
# expect to not see the old post anymore.
Convert that to a new spec my friend! Call this new spec deleting_posts_spec.rb and make sure it lives in the features folder with all its friends.
This is getting easy right? Writing tests isn’t as awful or daunting is it? Of course not!
Here’s what my spec looks like based on the above requirements:
require 'rails_helper'

feature 'Deleting posts' do
  background do
    post = create(:post, caption: 'Abs for days.')

    visit '/'

    find(:xpath, "//a[contains(@href,'posts/1')]").click
    click_link 'Edit Post'
  end
  scenario 'Can delete a single post' do
    click_link 'Delete Post'

    expect(page).to have_content('Problem solved!  Post deleted.')
    expect(page).to_not have_content('Abs for days.')
  end
end
Once again, go do your thing! You can now run rspec, get an error, fix the error and run rspec again!
Remember, refer to the original article when required!
Have you finished the above section?
Well congratulations, you’ve finished this part of the tutorial!
You’ve built a completely functional (although simple) ruby on rails application using behaviour driven development.
This would be perfectly fine but…
Let’s fix the ugly
It’s ok, you can admit to me that you’ve been venturing into your site, looking away from the terminal now and again. It helps sometimes I agree.
Notice how awful it looks?
Yeah, let’s fix that.
Install the bootstrap sass gem and set it up as per their docs. This involves renaming your application.css file, adding some lines of code to the top and also adjusting your application.js file. You can do this yourself because you’re awesome.
Add the below navbar and container to your layout.html.haml file (which I like to manually convert from .erb). The navbar is actually very simple, I copied the version from the bootstrap site and adjusted it ever so slightly to match Instagram’s styling.
!!! 5
%html
  %head
    %title Photogram
    = stylesheet_link_tag    'application', media: 'all', 'data-turbolinks-track' => true
    = javascript_include_tag 'application', 'data-turbolinks-track' => true
    = csrf_meta_tags
  %body
    %nav.navbar.navbar-default
      .navbar-container
        .navbar-header
          %button.navbar-toggle.collapsed{"data-target" => "#bs-navbar-collapse-1", "data-toggle" => "collapse", type: "button"}
            %span.sr-only Toggle Navigation
            %span.icon-bar
            %span.icon-bar
          .navbar-brand= link_to "Photogram", root_path
        .collapse.navbar-collapse#bs-navbar-collapse-1
          %ul.nav.navbar-nav.navbar-right
            %li
              = link_to "New Post", new_post_path
            %li
              = link_to "Login", '#'
            %li
              = link_to "Register", '#'

    .container
      -flash.each do |name, msg|
        = content_tag :div, msg, class: [:alert, alert_for(name)]
      = yield
Now copy the below CSS to your app/assets/stylesheets/application.scss file.
body {
  background-color: #fafafa;
  font-family: proxima-nova, 'Helvetica Neue', Arial, Helvetica, sans-serif;
}

.navbar-brand {
  a {
    color: #125688;
  }
}

.navbar-default {
  background-color: #fff;
  height: 54px;
  .navbar-nav li a {
    color: #125688;
  }
}

.navbar-container {
  width: 640px;
  margin: 0 auto;
}

.posts-wrapper {
  padding-top: 40px;
  margin: 0 auto;
  max-width: 642px;
  width: 100%;
}

.post {
  background-color: #fff;
  border-color: #edeeee;
  border-style: solid;
  border-radius: 3px;
  border-width: 1px;
  margin-bottom: 60px;
}

.post-head {
  height: 64px;
  padding: 14px 20px;
  color: #125688;
  font-size: 15px;
  line-height: 18px;
  .thumbnail {}
  .name {
    display: block;
  }
}

.image {
  border-bottom: 1px solid #eeefef;
  border-top: 1px solid #eeefef;
}

.caption {
  padding: 24px 24px;
  font-size: 15px;
  line-height: 18px;

}

.form-wrapper {
  width: 60%;
  margin: 20px auto;
  background-color: #fff;
  padding: 40px;
  border: 1px solid #eeefef;
  border-radius: 3px;
}

.edit-links {
  margin-top: 20px;
  margin-bottom: 40px;
}
Now add some bootstrap based divs to your views:
You can change your index view to look like this:
.posts-wrapper.row
  -@posts.each do |post|
    .post
      .post-head
        .name
          Ben Walker
      .image.center-block
        =link_to (image_tag post.image.url(:medium), class: 'img-responsive'), post_path(post)
      %p.caption
        =post.caption
Change your new.html.haml view to look like this:
.form-wrapper
  = simple_form_for @post, html: { class: 'form-horizontal', multipart: true } do |f|
    .form-group
      = f.input :image
    .form-group.text-center
      = f.input :caption
    .form-group.text-center
      = f.button :submit, class: 'btn-success'
Your edit.html.haml view to look like this:
.text-center
  = image_tag @post.image.url(:medium)
.form-wrapper
  = simple_form_for @post, html: { class: 'form-horizontal', multipart: true } do |f|
    .form-group
      = f.input :image
    .form-group.text-center
      = f.input :caption
    .form-group.text-center
      = f.button :submit, class: 'btn-success'
.text-center.edit-links
  = link_to "Delete Post", post_path(@post), method: :delete, data: { confirm: "Are you sure you want to delete this post?" }
  |
  = link_to "cancel", posts_path
And your show view to look like this:
.posts-wrapper.row
  .post
    .post-head
      .name
        Ben Walker
    .image.center-block
      =image_tag @post.image.url(:medium)
    %p.caption
      =@post.caption
    .text-center.edit-links
      = link_to "Cancel", posts_path
      |
      = link_to "Edit Post", edit_post_path(@post)
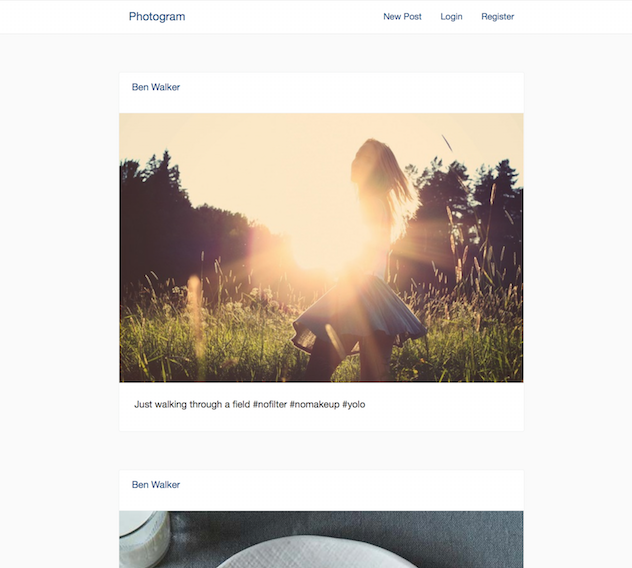
And check it out! Functional and beautiful.
The End (Until Part 2)
I sincerely hope you’ve enjoyed this tutorial.
BDD and testing in general is such a valuable skill. Being able to create new features or maintain existing code, and then test your codebase to ensure all functionality is retained is not only incredibly comforting as a developer, it’s also essential for your customers and clients.
Remember, this is part one of many. If you’d like to be notified of future parts or series, test-driven or not, sign up below.