Let's Build: Instagram with Rails. Log in and tell me I'm beautiful.
16 July 2015
Welcome back!
New here? Well we started re-building Instagram in part one. In that post we fleshed out the following features:
- Creation of posts with an image and caption.
- Being able to show an individual post.
- Editing of posts.
- Deleting of posts.
You can find the git repo of that completed project here for the non-tested version and here for the tested version.
Now it’s time to build out some more features that are crucial to our application. In this post we’ll build the following:
- The ability to create an account and login. I want the posts I create and the comments that I make to belong to me only.
- I want to have a user name. My lame email address just won’t cut it when I’m interacting with others.
- I want to be able to comment on my own posts and others.
- I want to delete the above posts the next day once regret sets in.
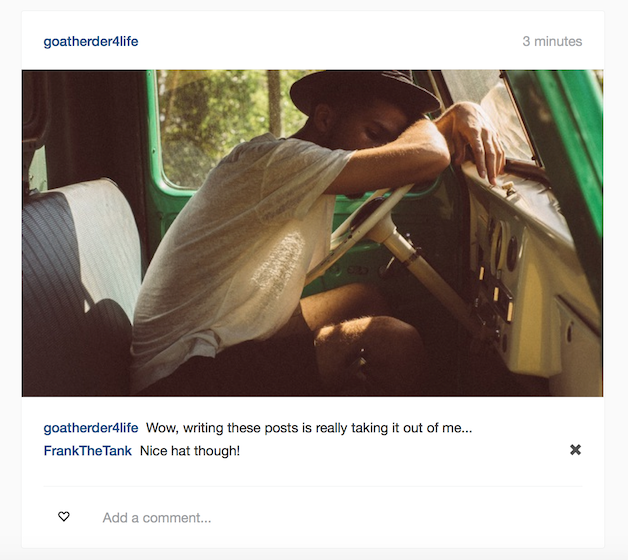
Sound good? Of course it does! Let’s get building. Oh yeah, it’ll look like this by the end:
Let’s start this part of the journey with… users!
Devise: You want to give yourself a baddass user name, I understand.
Of course you do! I do too… In fact, who doesn’t want the ability to give your interactions personality within this anonymous pit that is the web?
Let’s give our application and our users what they want, let’s let them create and use user accounts!
For this purpose I’m going to use the incredibly popular authentication gem: Devise. Why not build my own? Well, first, other tutorials can show you that if you really want to know (it’s certainly worth doing at least once). In fact, the Devise guys recommend you don’t use Devise for your first experience with Rails authentication.
Second, I want this series to be about you building familiarity with Rails. Which means building familiarity with incredibly popular Rails gems. Plenty of dev shops use Devise and it’s nice and easy to use if you want to build your own user auth features for your own app.
The point is: It’s worth learning, so let’s learn it.
Checkout the devise docs here and have a quick read. Read the installation instructions and the features that devise has.
Read it all? Great! Install it as per their instructions. Add gem to gemfile, run their installer and so on. Call your Devise model User. Do your best (and don’t worry about the user name functionality just now..).

We’re just warming up again for this article so let me walk you through the installation process.
Yes, I know you could’ve done it yourself. No, I don’t think you’re silly.
As per the Devise docs:
- Add the gem to your gemfile like so:
gem 'devise'
- Run bundle in your terminal (at the root of your application folder).
bundle install # or just bundle for the super-efficient readers.
- Question the meaning of life (optional).
- Install Devise via terminal by running their generator.
rails g devise:install
- Have an existential crisis (not optional).
- Follow the instructions that have just appeared in your terminal, thanks to the devise generator.
- Add the default_url_options to your
development.rb. - Make sure we have a root url (we do). You can check your
routes.rbfile if you don’t trust me (or just visit your roots route in your browser). - Check we have flash messages in our application.html.haml( or .erb) file? You check and tell me.
- We’re not using Rails 3.2 so don’t worry about point 4.
- We can customise our views as per point 5 (which we will do because we want a good looking site overall, no offence Devise).
- Add the default_url_options to your
Now that we’ve finished the above instructions, let’s continue. First, let’s create our Devise ‘User’ model by tappety tapping the following in your terminal:
bin/rails g devise User
Before you migrate your newly created migration, jump into the migration file found here: db/migrate/*last_file*.rb.
Have a read.
- Do the columns that are being created within the table make sense?
- Note how the creators have commented on the columns based on the different optional features Devise provides you?
- Notice some parts of the migration are commented out? If we wanted those additional features we could un-comment them, prior to migrating the changes.
Comfortable with your new creation? Good! It’s time to migrate your database by running the following code in your terminal.
bin/rake db:migrate
Oh yeah, last but certainly not least, let’s copy those Devise views as mentioned earlier. In your terminal, write:
rails g devise:views
Now we can easily access the Devise views for things such as new registrations, logins, password reminders etc etc with ease! We will want to change these at a later point in order to make it match the rest of our application’s styling.
Sneaky Extra Section
Want to auto-convert those default Devise .erb views to haml? Well check this out.
Still interested? Well install the html2haml gem via your terminal and run the commands as stated. Beautiful haml views will be returned!
End of sneaky section.
And that’s it, you’re officially ready to rumble and start adding Devise functionality to your application!
Let’s just have quick moment to consider what we’ve done here. We’ve really blitzed a lot of things in a relatively short amount of time.
By following the Devise instructions thus far we’ve now got the ability to:
- Visit specific paths to create a new user, sign in with a user, log out with a user.
- Create functionality around letting only signed in users perform certain actions or visit certain areas of our application.
- Access a range of Devise helper methods. One that will let us refer to the
current_userwhen creating, editing and deleting posts.
We’re not done though, oh no. Now we’ll have to adjust our application to fit this new concept of ‘users’.
Devise 1.1 - Changing stuff to make stuff work properly
Devise is installed and our application uses approximately none of it’s features so far. Let’s change that fact this very instant.
Run your rails server in your terminal. Once loaded, navigate over to localhost:3000/users/sign_up and check out our Devise registration form. Nice! But wait a second, it’s only asking us for email and password… I wanted a cool username!
Devise 1.1.1 - Adding custom columns to Devise users
Adjusting our User Model
To get our badass usernames working, we’re going to have to add a new column in our users table and we’re also going to need to make sure our Devise forms accept ‘username’ as an allowed parameter. You should google for a solution to this first, how do we add custom fields / columns to Devise?
What did you find? Did you even search? Of course you did, I trust you unconditionally.
Because you did a very thorough search, you might be there, sitting on that old chair of yours thinking, “Oh god, this is tricky”, but fear not good friend, I’m here to re-reassure you that everything is going to be A-O.K. Let’s make magic together.
First, let’s add the new column to our User table by generating a migration file and migrating. In your terminal move your fingers on your keyboard until this appears:
bin/rails g migration AddUserNameToUsers user_name:string
Before we get too excited with migrating our new file let’s index the user_name column and make sure each user name is unique.
Add the code below to your migration prior to running it. Open the file via db/migrate/*last-file-in-that-folder*. You want this line of code to still be within the ‘change’ method of the migration.
add_index :users, :user_name, unique: true
Once you’re extremely happy with your migration file, run migrate in your terminal.
bin/rake db:migrate
And to think your school teachers said you’d amount to nothing!
Now we’ve got a user_name string column in our User table.
While you’re on this current roll, let’s quickly add a validation to our user.rb model. Why, you ask? Because we DEMAND a user name from our users and we also want to set some limitations around user name lengths and such. I don’t want random people on Photogram called ‘a’ or ‘b’, that’s pure insanity and you know it.
Just below the class User line in the model, add:
validates :user_name, presence: true, length: { minimum: 4, maximum: 16 }
Fiddling With our Views
How about we add the user_name field to our registration view? This way, the user will have to create a user name at registration time, just what I want.
Open app/views/devise/registrations/new.html.haml and add an input to the form for user_name below the email input. It should look similar to:
= f.input :user_name, required: true
Add the same line to your app/views/devise/registrations/edit.html.haml file in the same position. This just means our user has the ability to edit their user name in the future if they so desire.
Alright, so view is sorted and model is sorted. Naturally you’d expect that if you were to navigate to the sign up page on your server (localhost:3000/users/sign_up) you’d think that your brand new field is good to go.
Well think again!
The fact is that in Rails 4 we have to specifically state what we’ll be accepting in our submitted forms. We looked at this previously when creating the private post_params method in the last article. With Devise we’ll have to allow our user_name to pass through in a way that’s a little trickier.
We’ll have to create our own controller that inherits from the original Devise Registrations Controller. This way we can allow the extra data we want without too much hacking.
In your controllers folder, create a new file called registrations_controller.rb. Copy or tap away on your keyboard until the following code appears:
class RegistrationsController < Devise::RegistrationsController

  private

  def sign_up_params
    params.require(:user).permit(:email, :user_name, :password, :password_confirmation)
  end

  def account_update_params
    params.require(:user).permit(:email, :user_name, :password, :password_confirmation, :current_password)
  end
end
Now we need to make sure Devise is looking at our newly created controller for the sign_up_params and account_update_params that are allowing the user_name parameter to pass through. Add the following line to your routes.rb file. Replace the devise_for :users line with the code below.
devise_for :users, :controllers => { registrations: 'registrations' }
Full credit for the above Devise functionality goes to Jaco Pretorius over at his blog. I’d give him a high five if possible.
Now we’re officially all done! Try creating a new user with a badass user name via your sign up page.
You should be redirected to your home page and get a lovely default welcome message.
Let’s quickly check that the user creation process all worked ok. In your terminal run the rails console with bin/rails c. Let’s see what information we have for our first user. Type:
user = User.first
and see what’s returned. Does user.user_name return the user name? It should, because you’re awesome and Ruby knows it!
I’m super stoked with how we’re going. Let’s now make sure each post belongs to a single user.
Devise 1.3.4 - My post are wittier than yours!
At the moment, anyone can create an individual post and that post doesn’t actually belong to anyone. Which means anyone can do anything to it! This is completely outrageous and must be fixed immediately.
Let’s change a few things.
- Let’s adjust our navbar so it shows specific links based on whether the user is logged in or not. We’ll make sure they link to the right spots too.
- Let’s make sure that only logged in users can create a new post and view existing posts.
- I want each post to belong to the user who created it.
- I want to show the user name of the creator of the post above each post.
- I want only the owner of the post to be able to edit or delete it.
You. Me. These features. Now.
1. The Clever Navigation Project
Our navbar lives here: app/views/layouts/application.html.haml for the moment. Let’s move it into its own partial view and add some logic with regards to displaying specific information for logged in users. This will tidy up our application view and let us separate functionality, a good thing.
Create a new file under the ‘layouts’ folder called _navbar.html.haml, in this folder, you want to relocate all of the code relating to your navbar. This looks like:
%nav.navbar.navbar-default
  .container-fluid.navbar-container
    .navbar-header
      %button.navbar-toggle.collapsed{"data-target" => "#bs-navbar-collapse-1", "data-toggle" => "collapse", type: "button"}
        %span.sr-only Toggle Navigation
        %span.icon-bar
        %span.icon-bar
      .navbar-brand= link_to "Photogram", root_path
    .collapse.navbar-collapse#bs-navbar-collapse-1
      %ul.nav.navbar-nav.navbar-right
        %li
          = link_to "New Post", new_post_path
        %li
          = link_to "Login", '#'
        %li
          = link_to "Register", '#'
Where that code used to belong in layouts/application.html.haml insert:
= render 'layouts/navbar'
Now it’s time to add some logic to our newly separated partial view. We’re going to use the Devise helper user_signed_in? to determine whether the user is in fact signed in or not. Where your current list elements are, replace with this:
%ul.nav.navbar-nav.navbar-right
  - if user_signed_in?
    %li
      = link_to "New Post", new_post_path
    %li
      = link_to "Logout", destroy_user_session_path, method: :delete
  - else
    %li
      = link_to "Login", new_user_session_path
    %li
      = link_to "Register", new_user_registration_path
Makes sense, right? If the user is signed in, display the “New Post” and “Logout” links. Otherwise, display the “Login” and “Register” links. Those links point to the appropriate routes based on what Devise provides us!
Want to know where I got those paths from for the links? If you were to run bin/rake routes in your terminal, you’ll quickly see the routes we can use, thanks to Devise.
What next? Well, anyone can still do anything on our application. Let’s crush their dreams and block access to certain parts of the site.
2. Photogram users only. We’re exclusive and stuff.
Jump back onto the Devise docs. At that link, notice the authenticate_user! helper? Hit command + F and search for it if not.
The reason it’s useful is that by adding a before_action to our posts controller with this helper, we can block any unauthorised user from accessing any actions we define.
For the moment, let’s make sure only registered (and logged in) users can access ALL of our actions.
At the top of your posts_controller.rb file add the before action.
Oh come on, you can do this!
Just below the first line, add the before filter:
before_action :authenticate_user!
All done? Great. Now jump back onto your running version of the app (or run bin/rails s in your terminal if it’s not already running) and navigate to the root route. Can you see stuff? Great, you’re logged in! Try logging out now by clicking the link in your navbar.
What happens??
You’re blocked! Try navigating to localhost:3000/posts/new.
NOPE!
It isn’t going to happen. Cool huh?
3. I want my own posts!!!
Yes I’m throwing a tantrum and no I don’t care. How can I show the world how amazing my life is via photos if people don’t know it’s MY photos they’re looking at??!?!
It’s time to personalise our posts.
Let’s think about the relationship that our users will have with the posts. You’ve dealt with relational databases before, how will this work?
I think a User will have many Posts and a Post will belong to a User. Happy with that?
Good.
Let’s add the relationship to our models. Add the following to models/post.rb:
belongs_to :user
And this next line to models/user.rb:
has_many :posts, dependent: :destroy
This is all well and good, but we now need a way for these tables to reference each other, we need our posts table to have a reference to the creator’s user id.
We’re going to need to generate another migration for this purpose. You know what? I think you should try to do it first. Generate a migration file that’ll add a user id to the posts table.
Solution time! In your terminal, run the following:
bin/rails g migration AddUserIdToPosts user:references
As per usual, you can check out the result in your db/migrate folder, it’ll be the last file.
Happy with it? Migrate in your terminal with:
bin/rake db:migrate
Now have a look in your db/schema.rb file. Notice how the posts table now has a user_id column? This is great! This means we can now link each post to a specific user through their id! In fact, I want to go a step further. I DEMAND that each post MUST have an associated user!
At the top of the post model (below the class line) add:
validates :user_id, presence: true
This simply means that with every new post object that’s created we need an associated user_id. Test it for yourself, try to create a new post in your application now and see what happens.
You’ll be redirected to the index as per usual and you’ll even get a nice flash message, but where’s your new post? It doesn’t exist!
You fell for my trick! Ha!
Let’s fix this now and stop tricking our friends by incorporating the current user into the create action within our posts controller.
Want to be awesome and give it a go yourself? Go ahead! Maybe commit your changes to git first though. Just in case…
Adjust the code within the post controllers’ new and create actions.
  def new
    @post = current_user.posts.build
  end

  def create
    @post = current_user.posts.build(post_params)

    if @post.save
      flash[:success] = "Your post has been created!"
      redirect_to posts_path
    else
      flash[:alert] = "Your new post couldn't be created!  Please check the form."
      render :new
    end
  end
Make sense? For the new action, we’re creating a new current_user.posts object for the sake of our form and in the create action, we’re creating that object using the post_params and either saving it or not.
Awesome.
4. Identify Yo Self
Now, how can we identify which post belongs to who? How about in the header of each post?
Try it yourself.
Replace “Ben Walker” (great name) in each post with the user name of the user who posted it! You’ll have to chain together a few methods to achieve this, just try to think about the relationship of the post to the user and the user_id to the user.
How’d you go?
Here’s how I did it.
I opened my index view and replaced Ben Walker with:
= post.user.user_name
Once you’ve done that, jump back onto your site and refresh your index. Get an error?
That’s OK!
It’s only because some of your posts at the moment don’t have an association to a user. You’ve got a couple of options here. You can:
- Open the Rails console and manually add a user_id to the posts that don’t have one existing (the posts that were created prior to implementing users).
- Undo the change to your index and manually delete the posts that you think don’t have an associated user_id. Adjust the index again and re-try.
- Delete all of your existing posts via the Rails console and start fresh.
Check this out!
I’m super proud of this, it takes us one step closer to an actual Instagram clone with some pretty crucial functionality.
Now that you’ve absorbed how to do this, go ahead and adjust the show view so that it also shows the user name of the creator instead of ‘Ben Walker’, just like we did above.
5. Protecting Personal Posts
Let’s now adjust a few things within our application so that only the creator of a post can edit or delete it. This is naturally a good idea and should prevent complete anarchy from prevailing in the short term.
First, let’s adjust the logic in our views so that the edit and delete links are shown on an individual post only if you have the ability to perform those actions.
In the show view, create an if / else statement that compares the user id of the creator of the post to the user id of the current user. If they match, show the ‘Edit Post’ link, otherwise, just show the cancel link.
Did you have a win? Here’s how I implemented this feature:
    - if @post.user.id == current_user.id
      .text-center.edit-links
        = link_to "Cancel", posts_path
        |
        = link_to "Edit Post", edit_post_path(@post)
    - else
      .text-center.edit-links
        =link_to "Cancel", posts_path
Pretty simple right? If the user id of the post we’re looking at matches the user id of the currently logged in user, we’ll show you the ‘Edit Post’ path. Otherwise? Only ‘cancel’ for you I’m afraid.
How secure is this implementation though? If you haven’t tried already, log out and create another user. Log in and then click on one of the posts that you’d created with the last user.
Great, that ‘Edit Post’ button is missing! But wait, what if we just navigate to localhost:3000/posts/#idnumber/edit? (Replace that id number there with one you actually have.)
We can edit and delete other people’s posts! Have a think about how you could ensure that only the owner of the post can access that edit and delete action. Try to implement it now.
Here’s how I solved this problem. First, I created a private method in the posts controller below the other two private methods. It looks like this:
def owned_post
  unless current_user == @post.user
    flash[:alert] = "That post doesn't belong to you!"
    redirect_to root_path
  end
end
Then I inserted a before_action at the top of the controller, specifying the owned_post method for the edit, update and destroy actions only.
before_action :owned_post, only: [:edit, :update, :destroy]
So unless you meet the requirements set by the owned_post method, you’ll be redirected back to the root route with a nice little message before any of the actions in the controller are called.
 My post.
 Not my post.
How good is this! We’ve setup what we wanted to for our Devise implementation so far. Some other features I’d love to have in this regard would be:
- Having a page for each user that only shows their posts.
- Following / unfollowing other users.
- Let other users follow / unfollow me.
- Have my own profile picture that is shown along with my posts and comments.
Guess what? We’re going to build those features in the next articles. But for now..
I want to comment on your photo, that’s a killer selfie and you deserve to know it!
What an incredibly composed selfie! The lighting, the focus, the angle of your nose in relation to your cheeks! The fact that I can’t comment on such a beautiful image is a crime against humanity, so let’s build the functionality now.
We’ll create comments for posts by doing a few things. Here’s some of the stuff we’re going to need:
- A comment model to store the lovely (and offensive) comments.
- A comment controller to handle the comment actions in a similar fashion to our post actions (think ‘create’ and ‘destroy’).
- A comment form for the index and show views so we can submit and / or delete our comments.
- A list of comments for each post so we can see our own and others comments too.
First, let’s generate a model for the comments. In your terminal, generate a model that has these columns:
- user:references
- post:references
- content:text
Not sure about ‘references’? What a great time to perform some self-driven research!
Need help hombre?
I generated my model by running the following code in my terminal:
bin/rails g model Comment user:references post:references content:text
Once generated, jump into the app/models/comment.rb file and ensure your model looks like this:
class Comment < ActiveRecord::Base
  belongs_to :user
  belongs_to :post
end
Finally, jump into the app/models/user.rb and app/models/post/rb files and add the following line to each:
has_many :comments, dependent: :destroy
This means that both users and posts “have many” comments and finishes off creating our associations between the models!
The dependent: destroy line means that if that object is destroyed, the associated objects will be destroyed too. In practice, this’ll mean that if a User is destroyed, all of their associated comments will too. If a Post is deleted, say “Goodbye” to the comments too!
Now that our model / database table / associates are sorted, let’s add our comments as a ‘nested route’ within our posts.
You can read more about Rails routing here if you want to add the nested route yourself or simply read how it works. Once you’ve had a read, go ahead and add the nested route in your routes.rb file!
Open up your routes.rb file in config/routes.rb and adjust your posts resources like so:
resources :posts do
  resources :comments
end
Alright, so we’ve got somewhere to store our comments and we’ve got sensible routes too.
Now we need a controller and a form. First, the controller!
Generate a new controller for the comments in your terminal now.
In your terminal, type:
bin/rails g controller comments
Now that we have an empty controller, it’s time to add the actions that we want. Let’s add a create action first. Make it blank to start with, and then have a ponder about what logic we’d like to include in that action. The feature will work like this.
- On the posts index view and the posts show view, a form will exist under each post for us to add a comment if we so desire.
- By writing something in that form and submitting, we save the comment to that post and it identifies who made the comment.
- We’re redirected back to wherever we were after submitting the form.
Have a think about this will work and then try to implement the feature yourself. I believe in you.
Well, here’s how my create action looks (as well as a bit more of the controller), it’s probably not as good as yours to be honest, you did a fantastic job just now.
before_action :set_post

def create
  @comment = @post.comments.build(comment_params)
  @comment.user_id = current_user.id

  if @comment.save
    flash[:success] = "You commented the hell out of that post!"
    redirect_to :back
  else
    flash[:alert] = "Check the comment form, something went horribly wrong."
    render root_path
  end
end

private

def comment_params
  params.require(:comment).permit(:content)
end

def set_post
  @post = Post.find(params[:post_id])
end
Make sense? At the very top we run the set_post before_action which we can see at the bottom of the snippet in the private method area. We’re just setting the @post instance variable to the post from the Post model based on the post_id params.
Looking at the create action itself, it should be reasonably self-explanatory. We build the new @comment object and then assign it the user_name field based on the user currently logged in. If the comment is saved, we get a lovely message and are redirected back. If not, we get sad.
While we’re at it, let’s add a destroy method to our comments controller. Implement it now if you dare. You’ve done this before after all!
Below my create action, I have the following:
def destroy
  @comment = @post.comments.find(params[:id])

  @comment.destroy
  flash[:success] = "Comment deleted :("
  redirect_to root_path
end
Pretty simple stuff! It looks very similar to the way we handled deletion of posts in Part 1.
So we’ve got a model, we’ve set up our routing appropriately and we have our controller doing important things when those actions are called. Let’s now implement the ability to actually create and delete comments in our user-facing app. Let’s attack our views!
Do you want to attack your own views and create this functionality? I’ll be honest, it was a bit tricky but hey, learning new things isn’t meant to be easy! Give it a go. Add a form to add a comment below the caption area of each post in your index.
My solution is below! Please note I’ve allowed a spot here to actually show the comments for each post too. I’m pretty sneaky like that.
.posts-wrapper.row
  -@posts.each do |post|
    .post
      .post-head
        .thumb-img
        .user-name
          =post.user.user_name
      .image.center-block
        =link_to (image_tag post.image.url(:medium), class:'img-responsive'), post_path(post)
      .post-bottom
        .caption
          .user-name
            = post.user.user_name
          = post.caption
        - if post.comments
          - post.comments.each do |comment|
            .comment
              .user-name
                = comment.user.user_name
              .comment-content
                = comment.content
              - if comment.user == current_user
                = link_to post_comment_path(post, comment), method: :delete, data: { confirm: "Are you sure?" }
        .comment-form
          = form_for [post, post.comments.new] do |f|
            = f.text_field :content, placeholder: 'Add a comment...'
A few things here. First, I didn’t use simple_form for this form because it wasn’t worth the hassle, it was much cleaner to use the standard Rails form_for.
Second, notice that link above the comment-form? Yep, we’re letting the user delete comments that belong to them.
While I think we’re making great progress, something is wrong… the app is just so… ugly now… Check out that new comment form you’ve just made via your index page. Gross.
Let’s fix the ugly! (and add a touch of extra functionality)
This is how each post will look after this small makeover:

This is great!
I’m super excited about how close we’re getting to Instagram-ness here so let’s get right into it.
First, for the sake of tidiness and being a good developer, let’s not repeat ourselves and drag our haml code for each individual post into it’s own partial view. That way, we can use it for both the show and index views and not repeat ourselves!
The partial view should be called _post.html.haml and it should live under the views/posts folder. You want it to look like this (I’ve added some different divs for styling):
.posts-wrapper
  .post
    .post-head
      .thumb-img
      .user-name
        = post.user.user_name
    .image.center-block
      = link_to (image_tag post.image.url(:medium), class:'img-responsive'), post_path(post)
    .post-bottom
      .caption
        .user-name
          = post.user.user_name
        = post.caption
      - if post.comments
        - post.comments.each do |comment|
          .comment
            .user-name
              = comment.user.user_name
            .comment-content
              = comment.content
            - if comment.user == current_user
              = link_to post_comment_path(post, comment), method: :delete, data: { confirm: "Are you sure?" } do
                %span(class="glyphicon glyphicon-remove delete-comment")
    .comment-like-form.row
      .like-button.col-sm-1
        %span(class="glyphicon glyphicon-heart-empty")
      .comment-form.col-sm-11
        = form_for [post, post.comments.new] do |f|
          = f.text_field :content, placeholder: 'Add a comment...'
Now that we can render this partial for the show and index views, let’s adjust them to suit. Adjust your index.html.haml so it looks like:
-@posts.each do |post|
  = render 'post', post: post
Make sense? We’re still iterating through each post and for each of those posts we’re rendering our post.html.haml partial.
We’re passing post from the index block to the partial as post too, so the partial know’s how to interpret it. Check out how we do this in the show view below to reinforce the concept.
Here’s the whole of the show.html.haml view now:
= render 'post', post: @post
- if @post.user.id == current_user.id
  .text-center.edit-links
    = link_to "Cancel", posts_path
    |
    = link_to "Edit Post", edit_post_path(@post)
- else
  .text-center.edit-links
    =link_to "Cancel", posts_path
We’re rendering the _post.html.haml partial, passing the @post instance variable as post, which is how we refer to the post in the partial! Want to experiment? Try just rendering the ‘post’ partial without the second argument. What happens?
Now we’ve cleaned up our code a little, we still have a problem. Our posts remain ugly.
Let’s add the CSS to beautify things! Replace your current application.scss file with the code below. Don’t delete the bootstrap imports though, you crazy cat. I know how much you like to delete things.
body {
  background-color: #fafafa;
  font-family: proxima-nova, 'Helvetica Neue', Arial, Helvetica, sans-serif;
}

/* ## NAVBAR CUSTOMISATIONS ## */

.navbar-brand {
  a {
    color: #125688;
  }
}

.navbar-default {
  background-color: #fff;
  height: 54px;
  .navbar-nav li a {
    color: #125688;
  }
}

.navbar-container {
  width: 70%;
  margin: 0 auto;
}

/* ## POST CUSTOMISATIONS ## */

.posts-wrapper {
  padding-top: 40px;
  margin: 0 auto;
  max-width: 642px;
  width: 100%;
}

.post {
  background-color: #fff;
  border-color: #edeeee;
  border-style: solid;
  border-radius: 3px;
  border-width: 1px;
  margin-bottom: 60px;
  .post-head {
    flex-direction: row;
    height: 64px;
    padding-left: 24px;
    padding-right: 24px;
    padding-top: 24px;
    color: #125688;
    font-size: 15px;
    line-height: 18px;
    .user-name, .time-ago {
      display: inline;
    }
    .user-name {
      font-weight: 500;
    }
    .time-ago {
      color: #A5A7AA;
      float: right;
    }
  }
  .image {
    border-bottom: 1px solid #eeefef;
    border-top: 1px solid #eeefef;
  }
}

.post-bottom {
  .user-name, .comment-content {
    display: inline;
  }
  .caption {
    margin-bottom: 7px;
  }
  .user-name {
    font-weight: 500;
    margin-right: 0.3em;
    color: #125688;
    font-size: 15px;
  }
  .user-name, .caption-content {
    display: inline;
  }
  #comment {
    margin-top: 7px;
    .user-name {
      font-weight: 500;
      margin-right: 0.3em;
    }
    .delete-comment {
      float: right;
      color: #515151;
    }
  }
  margin-bottom: 7px;
  padding-top: 24px;
  padding-left: 24px;
  padding-right: 24px;
  padding-bottom: 10px;
  font-size: 15px;
  line-height: 18px;
}

.comment_content {
  font-size: 15px;
  line-height: 18px;
  border: medium none;
  width: 100%;
  color: #4B4F54;
}

.comment-like-form {
  padding-top: 24px;
  margin-top: 13px;
  margin-left: 24px;
  margin-right: 24px;
  min-height: 68px;
  align-items: center;
  border-top: 1px solid #EEEFEF;
  flex-direction: row;
  justify-content: center;
}

/* ## Wrapper and styling for the new and edit views ## */

.form-wrapper {
  width: 60%;
  margin: 20px auto;
  background-color: #fff;
  padding: 40px;
  border: 1px solid #eeefef;
  border-radius: 3px;
}

.edit-links {
  margin-top: 20px;
  margin-bottom: 40px;
}
Jump back onto your index page and refresh. Good?
Good.
Now that we can stop gloating about how brilliant our application currently looks, I want to think about the functionality of our application.
Have you tried submitting a comment yet? It’s not very nice is it? You hit enter, you’re taken to the top of the page and are given the crappy message.
Every time I write a message, I can’t help but think one thing…
This feels nothing like Instagram.
And for good reason! It’s not! When I comment on someones post on Instagram, it’s beautiful! I simply write my scathing personal criticism in the comment box and then it appears magically on the post. The page doesn’t refresh and I’m not taken to the top of the page!
You know what? Let’s do that too. Let’s make our comments feel magic.
Magic Commenting, aka AJAX
You’ve heard of AJAX right? It’s a bleach cleaner that does wonders for your bathroom.
The other AJAX that I care about for the sake of our comments is described thusly on w3schools.com:
AJAX is the art of exchanging data with a server, and updating parts of a web page - without reloading the whole page.
This sounds perfect! Let’s make this happen.
In-built Rails AJAX
DHH is kind enough to include some magical AJAX goodies in Rails for free with every new project. This lives in the form of the included jQuery functionality within Rails.
The way it works is like so:
- We let Rails know we want to send our form data via AJAX by adding the
remote: trueargument to our form_for helper method. In practice, this is what it’ll look like in our comment form (don’t implement just now, this is just an example):
= form_for([post, post.comments.build], remote: true) do |f|
With that taken care of, we now need to make sure that our appropriate action (the create action in this case) will respond to this form via javascript and not just render a whole page of html for us again.
You might’ve noticed the respond_to method in your controllers in the past when you’ve used scaffolds to generate your controller. In those scenarios, respond_to will return JSON or html, depending on the request type. In our case, we want our ‘create’ action to return javascript. This is what it’ll look like:
respond_to do |format|
  format.html { redirect_to root_path }
  format.js
end
Lastly, we’re going to need to inform our application on how we now want to modify the DOM. We’re not refreshing the whole page after all, so you’re going to need to write some jQuery that adjusts the page appropriately. I’ll show you my jQuery implementation for the comment functionality in the below section.
Let’s add the AJAX functionality for only our create action for the moment. If you want to try this yourself first, now’s your chance!
Remember to commit your git changes first in case you need to revert during your adventure (no offense).
Let’s begin!
But first…
I want to quickly move our comments to their own partial view for the sake of this exercise. AJAX calls within rails work hand in hand with partials.
Why?
Well, we want to re-render the comments of an individual post once our new comment has been submitted. This way we can see it immediately, all without reloading the whole page!
The comment partial is shown below. Call it _comment.html.haml and create it in the views/comments folder.
#comment
  .user-name
    = comment.user.user_name
  .comment-content
    = comment.content
  - if comment.user == current_user
    = link_to post_comment_path(post, comment), method: :delete, data: { confirm: "Are you sure?" } do
      %span(class="glyphicon glyphicon-remove delete-comment")
Pretty basic right? We’ve just moved the comment part of our form into a separate file. Now, we’ll have to adjust our _post.html.haml partial so it renders the comments appropriately. Adjust your post partial so it looks like the code seen here:
 .posts-wrapper
  .post
    .post-head
      .thumb-img
      .user-name
        = post.user.user_name
    .image.center-block
      = link_to (image_tag post.image.url(:medium), class:'img-responsive'), post_path(post)
    .post-bottom
      .caption
        .caption-content
          .user-name
            = post.user.user_name
          = post.caption
        .comments{id: "comments_#{post.id}"}
          - if post.comments
            = render post.comments, post: post
    .comment-like-form.row
      .like-button.col-sm-1
        %span(class="glyphicon glyphicon-heart-empty")
      .comment-form.col-sm-11
        = form_for [post, post.comments.build] do |f|
          = f.text_field :content, placeholder: 'Add a comment...', class: "comment_content", id: "comment_content_#{post.id}"
There you go! But wait, = render post.comments is new! We’re not even specifically defining which partial view to render!
The above is Rails shorthand that we can use due to the fact that our partial’s name is ‘comment’. Rails assumes that this is the partial we want to render and we’re left with lovely, neat code!
Back to the AJAX features you fiend!
Adding remote: true to our form.
Our comment form is a part of our _post.html.haml partial, so open that file and add ‘remote: true’ to the form_for method.
Oh and while you’re in there, let’s added some extra code that will give us some unique div id numbers, based on the id of the object. (You might’ve noticed this on the code above).
    .post-bottom
      .caption
        .caption-content
          .user-name
            = post.user.user_name
          = post.caption
        .comments{id: "comments_#{post.id}"}
          - if post.comments
            = render post.comments, post: post
    .comment-like-form.row
      .like-button.col-sm-1
        %span(class="glyphicon glyphicon-heart-empty")
      .comment-form.col-sm-11
        = form_for([post, post.comments.build], remote: true) do |f|
          = f.text_field :content, placeholder: 'Add a comment...', class: "comment_content", id: "comment_content_#{post.id}"
Let’s allow our controller to return javascript on a call, not only html!
Adjust the create action in your comments controller to look like this:
  def create
    @comment = @post.comments.build(comment_params)
    @comment.user_id = current_user.id

    if @comment.save
      respond_to do |format|
        format.html { redirect_to root_path }
        format.js
      end
    else
      flash[:alert] = "Check the comment form, something went wrong."
      render root_path
    end
  end
This means that our create action can now respond with both html and javascript. The fact that we added ‘remote:true’ to our form means it’ll naturally be looking for a javascript response!
Also note, I deleted the flash message that we used to get upon creation of a comment. The fact that comments now appear in the list should be confirmation enough for our users (it is for the actual Instagram page).
Create the javascript response.
jQuery to the rescue! Create a new file in your views/comments folder. Call it create.js.erb. In that file, add the following javascript / ruby combination:
$('#comments_<%= @post.id %>').append("<%=j render 'comments/comment', post: @post, comment: @comment %>");
$('#comment_content_<%= @post.id %>').val('')
What exactly are we doing here? We’re selecting the comments_(specific id) div and appending the comment partial to begin with. After that, we select the comment_content_(specific id) div and change it’s value to an empty string.
What’s that doing in actual english?
- Adding our newly added comment to the list of comments.
- Clearing out the form that we just typed in.
Cool bananas batman!
Try it out now. You should be able to add comments with ease and they’ll MAGICALLY appear in the comment list of a post!
Try to do the same now for the deletion of comments. Remember, the process itself isn’t too tricky.
- Add ‘remote: true’ to the delete form_for.
- Make sure the destroy action in the controller will return javascript when requested.
- Last but not least, manipulate the DOM via jQuery. You’ll probably want to render the comments again, just like we did for the create action!
Here’s how I implemented AJAX into the deletion of comments.
Add remote:true to the form
This time we’re adding it to the destroy form, not the create form (you can find the form for the destroy action in the _comment.html.haml partial view). Check out my version below:
#comment
  .user-name
    = comment.user.user_name
  .comment-content
    = comment.content
  - if comment.user == current_user
    = link_to post_comment_path(post, comment), method: :delete, data: { confirm: "Are you sure?" }, remote: true do
      %span(class="glyphicon glyphicon-remove delete-comment")
Now its time to…
Add the javascript response to the controller action
Just as before, we can now make sure Rails responds with not only html but also javascript. Add the responds_to method to your destroy action within the comments controller.
  def destroy
    @comment = @post.comments.find(params[:id])

    if @comment.user_id == current_user.id
      @comment.delete
      respond_to do |format|
        format.html { redirect_to root_path }
        format.js
      end
    end
  end
Please note I’ve added some extra security in the delete action to ensure only the owner of a comment can delete it.
And last but not least..
Finalise with some lovely jQuery
Our jQuery should make sense after seeing the comment create feature in action. We’re simply appending our updated comments list to the comment div!
Create your new destroy.js.erb file within your views/comments folder (the same location as your create.js.erb file). It should look something like:
$('#comments_<%= @post.id %>').html("<%= j render @post.comments, post: @post, comment: @comment %>");
And guess what? That’s it for the delete functionality as well!
Try it now! Beautiful, right? You click the ‘x’, you get the prompt, you accept and….
Comment deleted.
###
Tidying Up
Let’s fix up a few loose ends in our application. These are a few small little items that are certainly worth looking at now that the core functionality is built.
- Add length limitations to caption column in Post.rb
We probably should’ve added this is Part 1 of the guide but let’s not hold a grudge. I think you’ll have the ability to do this now actually. Go ahead and add a minimum and maximum length validation to the Posts model for the content column. I think minimum should be 3 characters and maximum… Let’s say 300.
No hints here, validations should be easy as pie for a developer of your calibre. If your brain fails you, google will quickly show you how.
- Add a post ’time ago’ helper as per the desktop Instagram app
You know the one! It’s the bit on the top right hand corner that says that your last selfie was posted 44m ago! Rails makes this super easy to implement.
As per usual, try it yourself, you’re awesome and can do it. If you’re feeling lazy due to the time of day though, pilfer my code below. I won’t be angry…
just disappointed.
In your _post.html.haml partial view, add the .time-ago div and the time_ago_in_words helper with the post.created_at argument.
.user-name
  = post.user.user_name
.time-ago
  = time_ago_in_words post.created_at
.image.center-block
  = link_to (image_tag post.image.url(:medium), class:'img-responsive'), post_path(post
The surrounding code hasn’t changed, it’s just there for a reference.
Refresh your index or show view and you should be presented with a handsome timer!
Concluding part 2
I’m going to be honest with you, I’m super bummed I didn’t get to add the ‘like’ functionality in this part. The size of the article was just getting a little… unwieldy. And anyway, think about what you’ve achieved!
- Great user functionality, associated users and posts along with control over who can edit or delete specific posts.
- Your users can now comment on each others posts and delete them if required.
- Not only that, we implemented some great AJAX functionality so the whole commenting process is incredibly low-friction and beautiful to use!
Next time we’ll add ‘like’ functionality, I promise.
‘Like’ this series so far? Want me to hand write you a letter every time a new article is released?
Well, that isn’t going to happen.
What will happen though is that if you put your email address in the box below, I’ll let you know as soon as each part is released. Not only that, you’ll receive a beautiful pdf e-book version of the Let’s Build Instagram series delivered straight to your inbox once it’s complete.
Go on, there’s plenty more to learn and I’d love to share it with you.