Ruby on Rails Tutorial. Let's Build: Basecamp With Ruby on Rails 5.1 - Part 1
08 September 2017
Part One: The Setup and A Pretty Useless App
The plan for this project
We’re going to build a Basecamp clone that will look exactly like the image below by the end of this first lesson!

This tutorial will guide you through the whole process of creating a fully functional Rails application, just like we did with the Let’s Build Instagram with Ruby on Rails tutorial! Oh yeah, we’re also using the latest version of Ruby on Rails, Ruby on Rails 5.1
This guide is absolutely free and will have you:
- Creating company projects
- Implementing team message boards with embedded images and likes
- Creating team To-Do’s with user assignment
- Using React on Rails to power live chat
- Building out a user authentication system with Devise (and implementing Basecamps super-rad on-boarding experience)
- Styling your app just like your favourite project management tool
If you’d like to learn even more and implement features such as:
- Monthly subscription with Stripe
- Campfire live chat functionality
- Automatic check-ins
- Rails and Postgres performance optimisations
- Amazon S3 uploads
Then quickly scroll to the bottom of this page and enter your email address for early access. Take a moment now and then scroll back up to continue!
WARNING / DISCLAIMER / PLEASE DON’T SUE ME
I think that directly copying another product in order to profit from it is super dumb for many, many reasons, but emulating another product for the sake of learning is actually incredibly fun and rewarding.
It’s how I learnt to code!
In this series, we’re re-creating a very small part of Basecamps functionality in order to learn, not to clone their business model and be horrible people. Cloning another business is also a terrible way to start a business for what it’s worth, so don’t do that.
Now that you know that we’re not horrible people and what you’re going to learn, let’s get started!
Project Setup
Let me introduce you to someone very special to me:

This is Francis the goat and he will be your cruel mentor along the journey to becoming a developer.
He is a harsh, harsh mentor.
If you see Francis, you need to stop reading and do your absolute best to implement the functionality that I’ve just asked you to implement. And you need to do this all by yourself.
You will do this by:
- Referring to old projects (if you have any)
- Googling (one of the most important skills you can have as a developer)
- Reading official documentation (another super, super important skill which is difficult at the start, just do your best!)
- Trying random stuff and breaking things
If you don’t do the above when you see Francis, you’re only hindering yourself on your journey to becoming awesome and learning Ruby on Rails.
Don’t hinder yourself, be like Francis.
Be awesome.
Seriously though, let’s start the project…
You’re going to need both Ruby and Ruby on Rails installed on your computer. If you don’t have those installed, check out the Rails Getting Started Guide here and make magic happen. Don’t forget to leverage those Googling skills if you get stuck.
Have the essentials installed? Nice! If not, re-read the last paragraph.
It’s time to start your project.
Create a new project by reading the instructions on the Ruby on Rails Getting Started Guide. They have instructions on how to check the versions for all of your required libraries too, make sure you do that.
Call your project something that means something to you, whether it’s the side project you’ve always wanted to build or just a badass name that you’ve always liked.
This is your project, not mine, so you need to start treating it accordingly. If you are lacking an imagination, I’m going to call my project devcamp.
Go on, create your new rails application! Are you feeling social? Let us know what you called your project in the comments at the bottom of this article and let us know what the name means to you!
Help Zone: Do you need help setting up your project?
No worries my friend, we all start somewhere! In fact, when I first started to learn to code, looking at documentation would make me feel physically ill…
Now, if you’re completely sure you have all of the required libraries, tools and so on (as per the Rails getting started page), you’re going to have to open up your terminal on mac, or your command line on windows (I’ll refer to it as the terminal from now on) and navigate to the folder where you want to create your project.
Not sure how to navigate folders via the terminal? No problem, just google how to do it! It’s a skill you’re going to need in your future web developer career and there’s no time like the present to learn it. Moving around and getting stuff done in your terminal is difficult to start with, but once it clicks, you’ll never forget it.
Once you’re in a directory you’re happy with, simply type:
rails new devcamp
Don’t forget to use your own project name instead of devcamp!
So you’ve created a barebones Rails project, well done.
Let’s get that bad boy up and running by navigating into the new folder that the Rails generator has just created by typing cd devcamp into your terminal and then typing bin/rails server and hitting your return key like you’ve never hit it before.
With love.
Now, if all went well, you’ll be able to open your favourite browser and navigate to http://localhost:3000/ in order to see something along the lines of this:
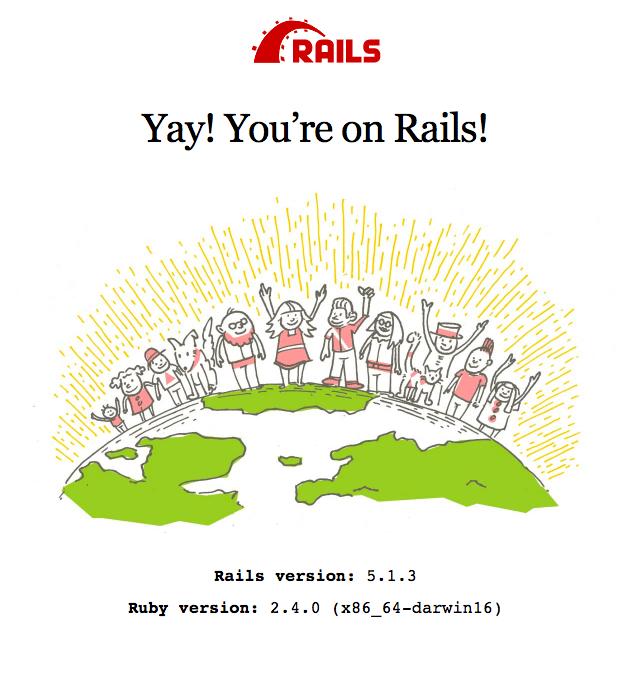
Yay!
What a human being you are, you’ve overcome all of the challenges thus far and now have humans and animals alike cheering your name from your browser tab.
Seriously though, this is a huge first step and here’s why.
We can now build pretty much anything
Being a developer isn’t about writing code, it’s about creating something that didn’t exist before. And this was the first step. Seriously, well done.
Thinking about our project
Now, a step that is missed in nearly every tutorial ever created on the internet is this:
Why are we doing what we’re doing?
- Why are we building this application?
- Why are we creating a page here?
- Why do we need all of these data models?
- Why is this important to our user?
So let’s put some time into that now. Let’s really think about what we want from this project.
We want:
- A home / landing page to convince users to join up
- Registration and login and all of the other features that go along with that.
- A page where a user can create a new project.
- A project page where that user can navigate to the message board, to-do’s or project settings.
- A todo page and a message board page.
Why do we want these features?
Well, because we’re kind of copying a very popular project management tool.
BUT! If this was one of my own personal or client projects, I’m continually asking myself why during the planning phase.
- Why do we need this feature?
- Why does it make our users life better?
- Is this the best place to put it? Why?
- How can we make the right action to take at every stage more obvious? Why is it obvious (or not)?
- How can we make our users feel less dumb? Why do they feel dumb at all?
- How does all of this align with our project goals?
For the sake of your projects success and your users sanity, always be asking yourself the above when you start any project. It will set the tone for the whole project.
Let’s assume that the Basecamp teams is smarter (and richer!) than us and stick with what they’ve done as we move forward.
Creating New Projects
In many Ruby on Rails tutorials, it’s expected that you use the Ruby on Rails scaffolding tool as a way of learning and implementing the whole CRUD (create, read, update, delete) experience.
What the scaffolding tool does is create the views, models, controllers and much more for a whole resource. For example, if you’re building a blog and scaffold a Post resource via your terminal, you very quickly have a barebones system for creating, reading, updating and deleting posts.
The problem is, you’re learning Rails and convenience like this comes at the expense of your brains ability to retain information.
You need to struggle and unfortunately, the Rails scaffolding tool is just too easy. So let’s do something else.
A brief interlude: Thinking about Model - View - Controller
Ruby on Rails is a framework that uses a Model - View - Controller pattern to create the functionality we’re hoping to achieve. Here’s a very, very brief explainer on what each of these do:
Model
The model portion of the application is separate from the user interface and manages data (usually from a database) and the management and modification of that data. In Ruby on Rails, a model will reference a database table and access the information within.
View
Deals with the human-facing interface of your application. The view portion in Ruby on Rails will be the template for a specific page (html with some sugar for showing dynamic data).
Controller
A controller directs information from the view to the model and vice versa. For example, imagine a user submits a form on your website with the intention of saving it (just like we’ll implement in a moment). The appropriate controller method will implement the functionality to interface with the model, save that data and then send some sort of a response back to the user.
If the above is tough to grok, don’t worry. You can still build something really awesome without understanding the internals. Repetition and being stubborn are key.
What we do still want to use is the Rails generators. Rails generators reduce the amount of boilerplate code we have to write and save us time.
Let’s implement a controller and a single view for our project functionality. In your terminal, type:
bin/rails g controller Project index
This will generate a new controller for us that is only interested in Projects (for the time being). It will also generate the index action (which is a controller method for a specific route or action), index.html view, stylesheet and a few other bits and pieces for a project.
You’ll find the generated code under the app sub-folder in your project, both in the controllers folder and the views folder.
You’ll also notice that under the config folder, in the routes.rb file that you now have a brand new route:
get 'project/index'
If you have a get route, it means that you can navigate to it via your browser! (that is what routing is, after all!)
In your browser, visit localhost:3000/project/index and be amazed at the incredibly designed page you see before you!
Wowee!

Before we implement any storage or collection of data in the next lesson, let’s create a static page that looks like the main Basecamp dashboard, but without the functionality (yet!).
If you’re not yet comfortable with html or css, now is the time to start. Just like learning the ropes with the terminal, html and css are core skills required in the web development game, so you may as well get messy and frustrated with it now.
Here’s what you should do: start with Bootstrap.
Sure it’s not the most beautiful or unique thing in the whole world, but what it will do is:
- Get you used to using html and how to structure pages with it.
- Understand CSS classes.
- Force you to read documentation in order to build stuff.
So let’s implement it now!
Open your app/views/layouts/application.html.erb file and pop in the below line of code above the <%= stylesheet_link_tag %> line in that file (this will let us override the default Bootstrap styles in the future).
<link rel="stylesheet" href="https://maxcdn.bootstrapcdn.com/bootstrap/4.0.0-beta/css/bootstrap.min.css" integrity="sha384-/Y6pD6FV/Vv2HJnA6t+vslU6fwYXjCFtcEpHbNJ0lyAFsXTsjBbfaDjzALeQsN6M" crossorigin="anonymous">
The link element above will import Bootstrap into your application for use throughout! I just grabbed this link from the official getbootstrap.com website, don’t worry, there’s nothing magic going on here.
A brief interlude: Rails Layouts
The application.html.erb template that you just modified is a universal template that wraps or contains the other templates that you’ll be creating for your applications functionality.
You can see where your other templates will be rendered within the application.html.erb file at the line with the <%= yield %> method. We can use this wrapper behaviour of the application.html.erb file for universal parts of our application like navigation bars and footers, as well as importing things like javascript and css that we want to be able to access throughout our application and not just on specific pages.
Here’s what the official Basecamp navbar looks like in it’s standard form:

It’s your goal, NAY , your new purpose in life to re-create this navbar (without any functionality for the time being) in html and css using the Bootstrap getbootstrap.com documentation and some good old fashioned moxy.
Here are some pointers:
- You can find the docs for Bootstrap navigation bars here: https://getbootstrap.com/docs/4.0/components/navbar/
- The Basecamp navbar has left-aligned, centre-aligned AND right-aligned elements. I wonder where the documentation for how to achieve that could be?
- Basecamp has a snazzy little logo for the left side of their navbar. Here’s a snazzier version for you to use (feel free to make your own but don’t expect it to have the same production quality, it takes years of experience to create a logo like this). You want yours to be 30px high and 37px wide if you go the custom route.
![]()
- Pop your navbar image here:
app/assets/imagesto access via the application. Use Railsimage_urlhelper to use the image (Google it or read the docs!) - The background colour used by Basecamp for their navbar is:
rgba(251,248,245,0.98)and the bottom border colour is:rgba(0,0,0,0.1) - For the time being, implement the navbar html in-between the first <body> element and the
<%= yield %>call in theapp/views/layouts/application.html.erbfile. - You can modify the base CSS created by Bootstrap by editing
app/assets/stylesheets/application.cssor you can create a new stylesheet callednavbar.scssif you’re super organised (for what it’s worth, I end up creating anavbar.scssfile, so maybe do that).
Go forth and get frustrated and / or kick butt! Implement a new navbar with Bootstrap and some custom styling!
Just to confirm, you tried it yourself, right? This is a trust based system, as I’m both very far away from you and you’re completely anonymous so I can’t enforce anything here.
But if you don’t try yourself, I won’t be angry… just disappointed.
Here’s my html code for our snazzy navbar using Bootstrap:
<nav class="navbar navbar-expand-lg justify-content-between">
  <a class="navbar-brand" href="#">
    <img src="<%= image_url('navbar-icon') %>" width="37" height="30" class="d-inline-block align-top" alt="">
  </a>
  <ul class="navbar-nav align-self-center">
    <li class="nav-item">
      <a class="nav-link" href="#">Home</a>
    </li>
    <li class="nav-item">
      <a class="nav-link" href="#">Latest activity</a>
    </li>
    <li class="nav-item">
      <a class="nav-link" href="#">Pings</a>
    </li>
    <li class="nav-item">
      <a class="nav-link" href="#">Hey!</a>
    </li>
    <li class="nav-item">
      <a class="nav-link" href="#">Campfires</a>
    </li>
    <li class="nav-item">
      <a class="nav-link" href="#">Reports</a>
    </li>
    <li class="nav-item">
      <a class="nav-link" href="#">Find</a>
    </li>
  </ul>
  <ul class="navbar-nav align-self-center">
    <li class="nav-item navbar-profile-icon">
      <a class="nav-link" href="#">B</a>
    </li>
  </ul>
</nav>
Bootstrap 4 uses something called Flexbox will allows us to create some great styles FAR easier than you can without. The justify-content-between class performs one of these feats by separating the child elements evenly with space between them.
In this case, our child elements are the:
- Navbar brand.
- The
navbar-nav<ul>element that contains the majority of our links. - The final
navbar-nav<ul>element that contains our little profile section.
This creates a lovely Basecamp-ey effect!
To customise a bit of the default Basecamp styling, I wrote the following sass at app/assets/stylesheets/navbar.scss.
.navbar {
  background-color: rgba(251,248,245,0.98);
  border-bottom: 1px solid rgba(0,0,0,0.1);
  font-size: 1.5rem;

  .navbar-nav {
    .nav-item {
      margin-right: 1rem;

      &:last-child {
        margin-right: 0;
      }
    }

    .nav-item a {
      color: #283c46;
      padding: 0.7rem;

      &:hover {
        background-color: #fff;
        border-radius: 20px;
      }
    }

    .nav-item.navbar-profile-icon {
      height: 25px;
      width: 25px;
      border-radius: 50%;
      background-color: #8067c3;
      align-self: center;
      display: flex;
      align-content: center;
      justify-content: center;

      a {
        text-align: center;
        align-self: center;
        color: #fff;

        &:hover {
          background-color: transparent;
          border-radius: 0;
        }
      }
    }
  }
}
While I was poking about in sass, I also added these lines to app/assets/stylesheets/application.css to create a nice base for us to work from:
html {
  font-size: 10px;
}

body {
  color: #283c46;
  background-color: #f5efe6;
  line-height: 1.5;
  margin-top: 0;
  font-size: 1.7rem;
}
To summarise, I’ve simply over-ridden a number of Bootstrap styles, but used their great class system wherever possible. Our recreation isn’t perfect, but I think it looks great for the effort put in!

If you can’t see your updated styles, make sure you’re on the new page that we’ve created, the one at `http://localhost:3000/project/index. The home page won’t show our updated styles until we override the Rails placeholder.
Just to make sure we’re on the same page, here’s my full application.html.erb file:
<!DOCTYPE html>
<html>
  <head>
    <title>Devcamp</title>
    <%= csrf_meta_tags %>

    <link rel="stylesheet" href="https://maxcdn.bootstrapcdn.com/bootstrap/4.0.0-beta/css/bootstrap.min.css" integrity="sha384-/Y6pD6FV/Vv2HJnA6t+vslU6fwYXjCFtcEpHbNJ0lyAFsXTsjBbfaDjzALeQsN6M" crossorigin="anonymous">
    <%= stylesheet_link_tag    'application', media: 'all', 'data-turbolinks-track': 'reload' %>
    <%= javascript_include_tag 'application', 'data-turbolinks-track': 'reload' %>
  </head>

  <body>
    <nav class="navbar navbar-expand-lg justify-content-between">
      <a class="navbar-brand" href="#">
        <img src="<%= image_url('navbar-icon') %>" width="37" height="30" class="d-inline-block align-top" alt="">
      </a>
      <ul class="navbar-nav align-self-center">
        <li class="nav-item">
          <a class="nav-link" href="#">Home</a>
        </li>
        <li class="nav-item">
          <a class="nav-link" href="#">Latest activity</a>
        </li>
        <li class="nav-item">
          <a class="nav-link" href="#">Pings</a>
        </li>
        <li class="nav-item">
          <a class="nav-link" href="#">Hey!</a>
        </li>
        <li class="nav-item">
          <a class="nav-link" href="#">Campfires</a>
        </li>
        <li class="nav-item">
          <a class="nav-link" href="#">Reports</a>
        </li>
        <li class="nav-item">
          <a class="nav-link" href="#">Find</a>
        </li>
      </ul>
      <ul class="navbar-nav align-self-center">
        <li class="nav-item navbar-profile-icon">
          <a class="nav-link" href="#">B</a>
        </li>
      </ul>
    </nav>
    <%= yield %>
  </body>
</html>
Nice work!
Before we move on, let’s move our navigation bar into it’s own template file. This new template file will be called a partial template that we can then import as required. It’s a great way to keep our templates clean and modular!
Create a new template within the layouts folder at app/views/layouts and call it _navbar.html.erb. Now cut and paste your navbar html (from <nav> tag to </nav> tag) into the new file.
If you were to refresh your page now, your navbar should’ve disappeared and this is to be expected (our application.html.erb file has no reference whatsoever to our navbar any more!).
We have to now ask Rails to render our new partial template. Above the <%= yield %> line in app/views/layouts/application.html.erb, enter:
<%= render "layouts/navbar.html" %>
Now refresh your application in your browser and say hello to your returned navbar!
Creating a dummy home page
This is what the projects row (that we’re trying to re-create) looks like on a fresh Basecamp account:
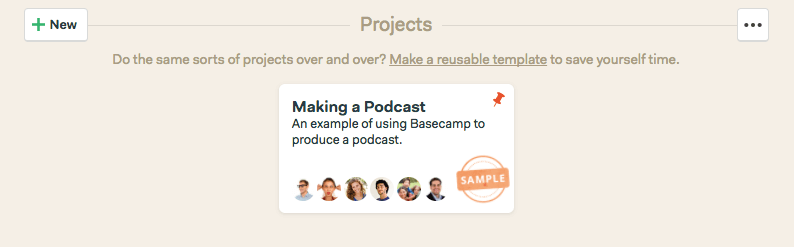
It’s time for you to implement this on your very own view at app/views/project/index.html.erb!
Here are some pointers to getting you started (try your best to implement this, even if you’re not happy with the end result).
- We don’t have icons or dummy just yet, so don’t worry about the icons or images for the time being. If you really want to, go ahead and do it, but I’ll be waiting a little.
- If you can implement the horizontal line as part of the Projects header, you’re obviously pretty competent with CSS, well done! We won’t worry about it for the sake of this lesson though.
- Each project has its own ‘card’ that will be a link to a specific project. This card should be contained within a column that spans one third of a row. This is Bootstrap 101, so if you don’t understand it (which is fine), see if the docs here help.
- A project card should be a link (
<a>element) that a user can click on! - Implement the CSS for this page at
app/assets/stylesheets/project.scssthat was auto-created for us earlier when we generated our Project controller. - The heading colour for this page is
#aa9c84. - In order to make the card look good, try this styling (feel free to make it your own!):
.project-card {
  display: block;
  color: #283c46;
  background-color: #fff;
  box-shadow: 0 1px 2px #aa9c84;
  border-radius: 6px;
  padding: 1.5rem;
  height: 100%;
}
Go on, see what you can achieve!
How did you go? It’d be great if you could leave a comment in the comments section below this article and share with everyone else. Be brave and share a screenshot as well! I’ll wait while you do that now.
Thanks!
I’ll show you what I came up with for the sake of our projects index and then I’ll explain to you what I did.
First, our new app/views/project/index.html.erb view:
<main class="container home">
  <div class="row home-header">
    <div class="col-md-1 mr-auto">
      <button class="btn btn-primary mr-auto">New</button>
    </div>
    <div class="col-md-4">
      <h3 class="text-center">Projects</h3>
    </div>
    <div class="col-md-1 ml-auto">
      <button class="btn ml-auto">...</button>
    </div>
  </div>
  <div class="row home-projects">
    <div class="col-md-4 project-col">
      <a href="#" class="project-card">
        <h4>Dummy Project</h4>
        <p>What a wonderful project this will be!</p>
      </a>
    </div>
    <div class="col-md-4 project-col">
      <a href="#" class="project-card">
        <h4>Wonderful Project</h4>
        <p>This will be a most wonderful project</p>
      </a>
    </div>
    <div class="col-md-4 project-col">
      <a href="#" class="project-card">
        <h4>Yet another project?</h4>
        <p>Busy, busy!</p>
      </a>
    </div>
    <div class="col-md-4 project-col">
      <a href="#" class="project-card">
        <h4>Lucky fourth project</h4>
        <p>There has never been a luckier project than this one</p>
      </a>
    </div>
  </div>
</main>
First, I created a container that we can house our rows within (this is a Bootstrap norm). I also added some custom classes for the sake of styling which you’ll see in a moment. Added classes are:
homealongside thecontainer.home-headerto identify the header row.home-projectsto identify the projects row (and the projects within).project-colandproject-cardthat identify each project column and the project card within.
Something worth pointing out is my usage of the mr-auto and ml-auto Bootstrap classes. These are helper classes to achieve auto margin-right or auto margin-left which is what pushes them away from the center column!
Here’s the styling I used to achieve a similar look to Basecamp:
.home {
  h3 {
    color: #aa9c84;
  }

  .home-header {
    margin-bottom: 3rem;
  }
}

.project-col {
  margin-bottom: 1.5rem;
}

.project-card {
  display: block;
  color: #283c46;
  background-color: #fff;
  box-shadow: 0 1px 2px #aa9c84;
  border-radius: 6px;
  padding: 1.5rem;
  height: 100%;

  &:hover {
    text-decoration: none;
    color: #283c46;
  }

  h4 {
    font-weight: bold;
    margin-bottom: 0.5rem;
  }

  p {
    font-size: 1.2rem;
  }
}
To summarise, I:
- Changed the header’s
h3colour and added some margin below the header. - Ensured that each project column has some margin below (so that projects stack correctly if we have more than 3 and move into a new row).
- Styled the
project-cardby changing the<a>element into ablockelement and over-riding some of the link styling.
One sneaky little thing I also implemented was reducing the standard size of our Bootstrap column class to make it narrower and more Basecamp-ish. I also added some margin to the top of a .container that is also a <main> html element. This has the simple effect of moving our main content away from our navbar.
main.container {
  margin-top: 4rem;
}

@media (min-width: 48em) {
  .container {
    max-width: 68rem;
  }
}
Here’s what I ended up with:
Not too shabby, right?!?
As always, make the project your own. If you don’t like some of the naming conventions I used for the CSS classes, change them!
Want some extra drop shadow on each project card?
Drop that shadow like it’s hot.
And for the love of the gods, use your own text within each project. Get creative!
What a start!
Here’s what we’ve achieved in this lesson:
- Created a brand new Rails project
- Created a new controller and views for our Projects resource
- Implemented a static navbar partial for our application
- Created a static Projects index page that will set the foundation for what’s to come!
Next lesson, we’ll:
- Create a Project model that will allow our users to store and modify their projects in a database.
- Get dynamic with our Projects and give our users the ability to create a new project (using a snazzy jQuery powered pop-over form).
- List real projects that are saved in our database, instead of dummy projects.
- Move our project cards into their own partial template.
- Create a static project dashboard that will then allow us to navigate to our To-Do lists and Message Boards!
Did you enjoy this lesson? Sign up below and I’ll let you know as soon as the next one is released. I’ll also compile the free version of this series into a pdf e-book and send it to you once it’s complete!
If you’d like to learn more about business and product design, check out my series: Let’s Build a SaaS Business.
If you haven’t already, you can also check out the original “Let’s Build” series here with Let’s Build Instagram.
Finally, if you’d like to work together, please check out my client case studies here and get in contact here. I love designing and creating client projects and maybe, just maybe, we might be a great fit for each-other.
All the very best my friend,
Ben