Ruby on Rails Tutorial. Let's Build: Basecamp With Ruby on Rails 5.1 - Part 2
21 September 2017
Part Two: Creating New Projects With Magic (Javascript)
Did you randomly land on this page, but are looking to learn Ruby on Rails by building fun projects? Start with the beginning of this project right here and start building a Basecamp clone!
Our application is quite… static at the moment
While I’m happy with what we achieved in Part One of this tutorial, it just seems that no matter how many times I click on this “New” button, nothing happens!
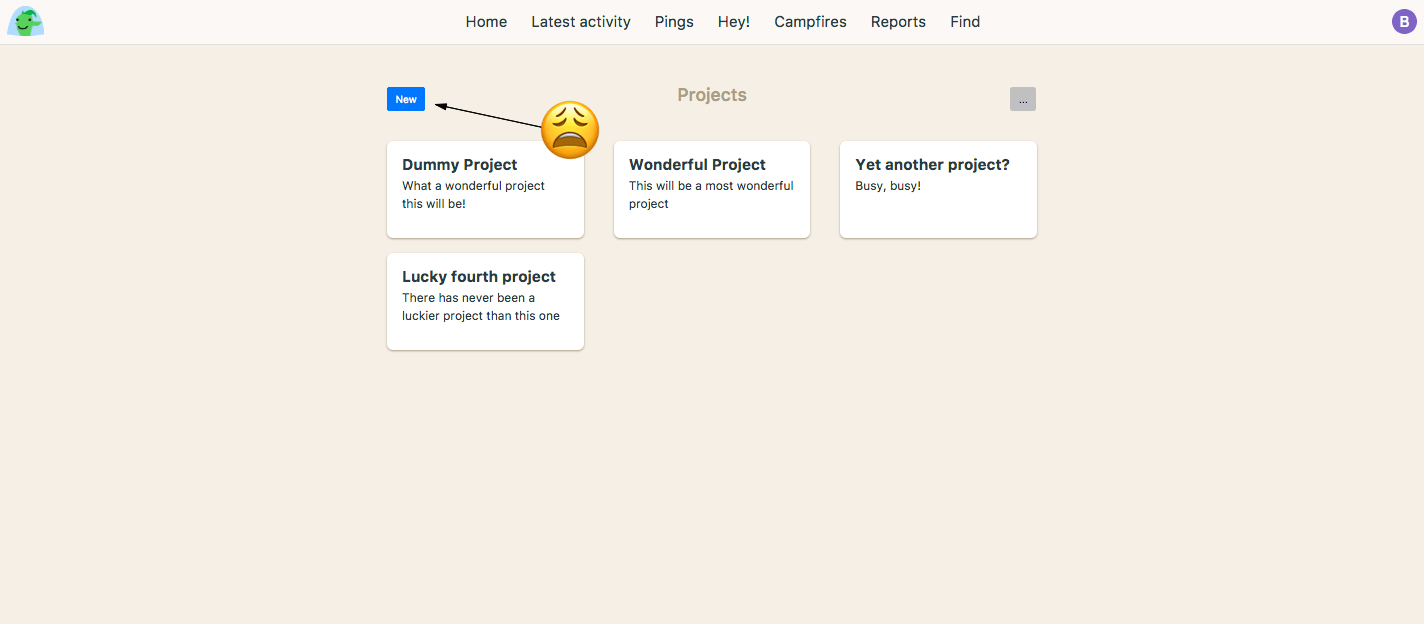
I’ve been trying for hours now, so I think it’s time to dig deeper.
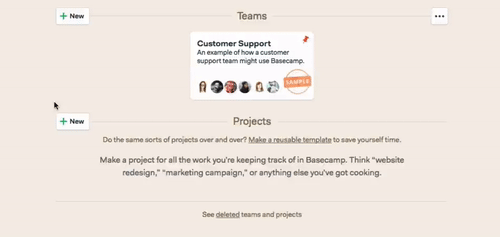
Leaning on our ever-present muse, here’s what happens when I click on the New button in Basecamp in order to create a new project:
A user clicks on the new button and a little popover containing a form appears allowing our user to enter a project name. Once they hit enter or click the Save button, the popover closes and a new project magically appears on our dashboard.
Let’s create functionality just like this!
This is quite a departure from the standard CRUD tutorial, so if you don’t feel comfortable with Javascript (there will be a bit) and your current focus is learning Ruby, just copy and paste what I’ve created here or create a project in a more traditional CRUD way (check out the Rails scaffolding tool examples).
The last thing I want to do is draw your focus away from Ruby. If you’re not ready to learn Javascript, don’t feel bad, just stay the course.
Now remember that our projects index page can be found at localhost:3000/project/index, so if you’re not already there, go there in your browser now. If you need to start your Rails server, you can do so by navigating to your Rails project in your terminal and then typing rails server to start!
A sprinkle of javascript vs full-blown Single Page Application
I’m a strong believer in using just a “sprinkle of javascript” in my projects, unless the interface requires something more complex (I do love using React when the occasion calls for it) and this is a perfect example of where using a sprinkle of javascript makes perfect sense.
Here’s what’s happening with the functionality we’re looking to implement:
- There is a hidden form card displayed absolutely in relation to our “New” button.
- When a user clicks on the button, we simply show the form card with some javascript and CSS.
- When a user pops in a project name into the form and clicks “Save”, the form performs a standard
POSTrequest to a controller action, just like it normally would, BUT will do so via AJAX. - Instead of being redirected to a different site, a new project card appears at the end of our existing projects and our form pop-over closes.
Let’s build it now!
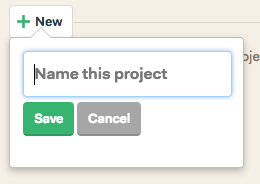
First, we’ll create a static version of the hovering card and form and we’ll hide it with some javascript afterwards.
Are you OK with CSS and html? Do you understand how to position this card and form in relation to the new button?
If so, implement it yourself now, using the Basecamp image above as a reference. Don’t worry about implementing the form portion of the popover, but a static text input and buttons would be a nice touch if you can achieve it!
If you don’t feel confident, try to stretch yourself and flex your googling muscles to see if you can achieve something similar. Do your best!

Here’s how I implemented my new project card / pop-over:
First, I added the below html to my app/views/project/index.html.erb within the .home-header div section and existing col-md-1 mr-auto div.
<div class="col-md-1 mr-auto">
  <button class="btn btn-primary mr-auto">New</button>
  <div class="project-popover">
    <div class="form-group">
      <input type="text" placeholder="Name this project" class="form-control">
    </div>
    <button type="submit" class="btn btn-success">Save</button>
    <button class="btn btn-secondary">Cancel</button>
  </div>
</div>
I then added some css to my app/assets/stylesheets/project.scss file:
.project-popover {
  width: 220px;
  position: absolute;
  top: 3rem;
  border-radius: 4px;
  border: 1px solid rgba(0,0,0,0.25);
  box-shadow: 0 3px 10px rgba(0,0,0,0.25);
  z-index: 1;
  background-color: #fff;
  padding: 1rem 1rem 2rem;
}
Refresh your home page and you’ll see something like this:
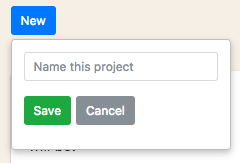
Is it perfect? No! Do I want to get sued? No! Will it teach you how to implement some cool functionality?
Yes!
Now it’s time for us to show and hide our little form popover with some CSS and javascript. Let’s implement the CSS first.
First I added a simple is-hidden class to the .project-popover div as seen here:
<div class="col-md-1 mr-auto">
  <button class="btn btn-primary mr-auto">New</button>
  <div class="project-popover is-hidden">
    <div class="form-group">
      <input type="text" placeholder="Name this project" class="form-control">
    </div>
    <button type="submit" class="btn btn-success">Save</button>
    <button class="btn btn-secondary">Cancel</button>
  </div>
</div>
And I then added that class to my app/assets/stylesheets/project.scss file, below the new .project-popover styling with a simple property:
.is-hidden {
  display: none;
}
If you refresh the page now, you’ll notice that the new project popover has disappeared!
Magic!
Now to understand what we’ll be implementing, here’s what I want you to do. If you’re using Chrome as your browser, I want you to right click on our new popover and click ‘Inspect’.
Now that your developer panel is open, I want you to delete the is-hidden class from the .project-popover div by double clicking on the is-hidden text, highlighting it and then deleting.
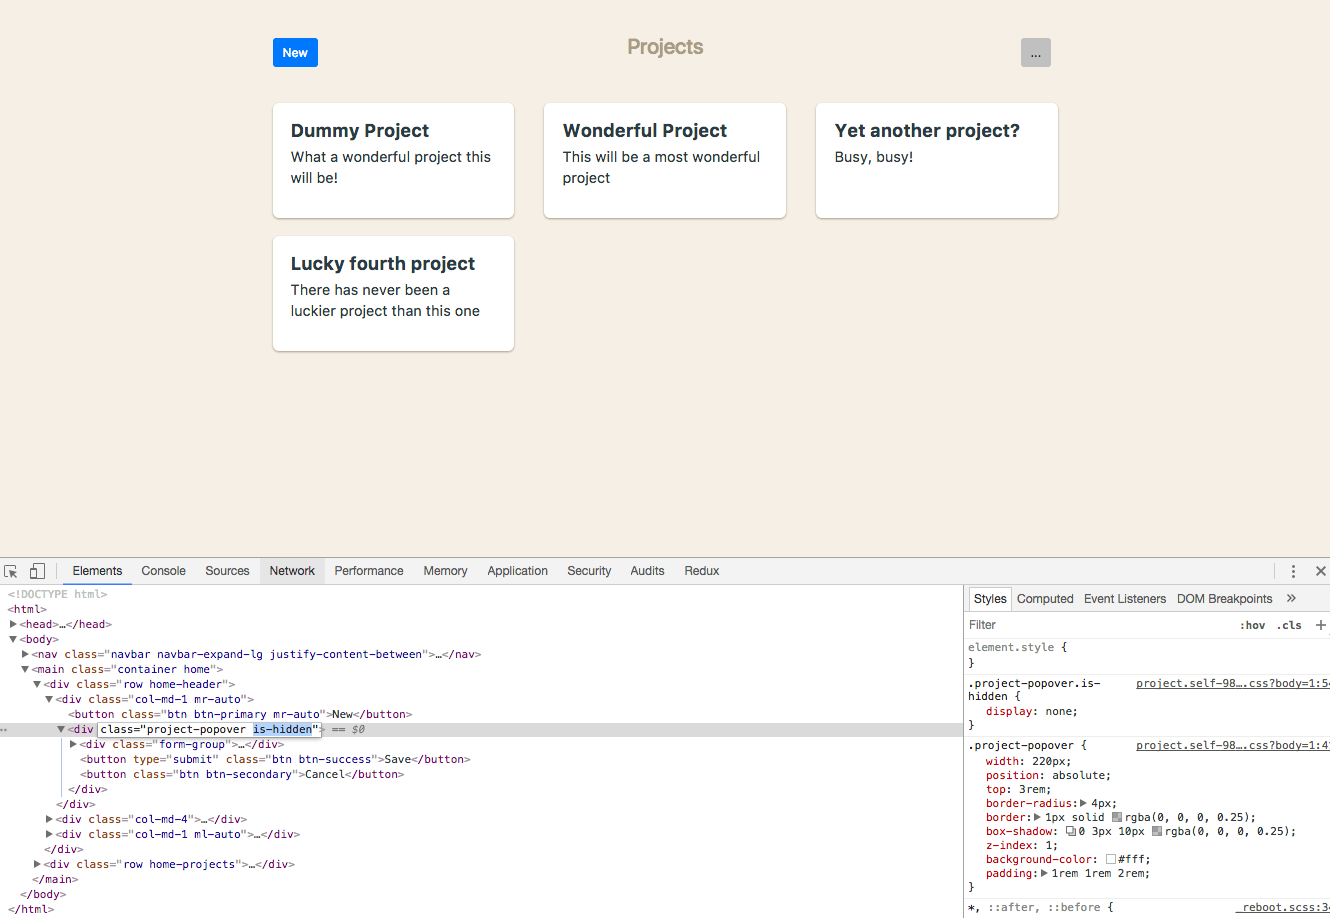
And once deleted, your form will re-appear!
 Can you now guess what our javascript will do? It will simply remove and re-attach our
 is-hidden class as required by the user’s clicks.
Vanilla Javascript & A Popover
Let’s create a new javascript file called project.js which will deal with any project related Javascript code. Create it at app/assets/javascripts/project.js.
Now, we need to think about how to implement our functionality:
- We need to attach an event listener to the New button that will listen for a click action.
- If the click action is fired, remove the default
is-hiddenclass from the project pop-over. - If the user instead clicks on the Cancel button, hide the popover again.
First, to attach an event listener, we need to be able to identify a specific part of our page and a good way to do this is with a unique id on that element.
Back in your app/views/project/index.html.erb view, add an id of new-project—button to the New button (feel free to use a different id name for the sake of your brains learning):
<div class="col-md-1 mr-auto">
  <button id="new-project-button" class="btn btn-primary mr-auto">New</button>
  <div class="project-popover is-hidden">
    <div class="form-group">
      <input type="text" placeholder="Name this project" class="form-control">
    </div>
    <button type="submit" class="btn btn-success">Save</button>
    <button id="cancel-project-popover" class="btn btn-secondary">Cancel</button>
  </div>
</div>
Now we have a simple way to select our unique button in javascript!
While you’re there, add an id to the .project-popover div like I did above. I used new-project-popover as the id name for this div. Also add an id of cancel-project-popover to the Cancel button of the popover.
Now that we’ve got our identifiers in place we’re ready to create our functionality. I’m going to use plain old vanilla Javascript here, but if you’d like to use jQuery or some other preferred technique, please feel free to do so. jQuery will make this codebase easier to read, but I think it’s worthwhile wrapping your head around plain old Javascript and how it works with the DOM.
Read through my comments in the code below if you need bonus tips.
// We have to make sure turbolinks is loaded before we work our magic, feel free to experiment without!
document.addEventListener('turbolinks:load', function () {
  // Assign the elements we're intrerested in to variables
  const openProjectButton = document.getElementById('new-project-button')
  const projectPopover = document.getElementById('new-project-popover')

  // Let's check to see if these elements exist before we add our listeners. We'll get warnings in our browser console otherwise.
  if (openProjectButton && projectPopover) {
    // Attach an event listener to our new project button
    openProjectButton.addEventListener('click', function () {
      // If the project popovers class list contains the 'is-hidden' class, remove it, otherwise return null
      return projectPopover.classList.contains('is-hidden') ? projectPopover.classList.remove('is-hidden') : null
    }, false)

    // Attach a click event listener to our cancel button
    const cancelProjectPopover = document.getElementById('cancel-project-popover')
    cancelProjectPopover.addEventListener('click', function () {
      // We can safely assume that if our user can see the Cancel button, then the
      // .is-hidden class is not part of the class list of project pop-over and we can
      // add it.
      return projectPopover.classList.add('is-hidden')
    }, false)
  }
})
If any of this doesn’t make sense, please just let me know in the comments and I’d be happy to help out. It’s better to ask the question and understand.
Now it’s your turn to test it out!
- Your project popover should be hidden by default when you load the page.
- Clicking on the button should display the new project popover.
- Clicking cancel should close the modal.
Bonus Challenge
Now there are a few extras that I would like you to try out at this point:
- Very, very easy: Add an
autofocusproperty to the input field that’s part of our pop-over form. This is a great little tweak that will reduce the need for extra clicks from our users. Little touches like this can really affect the feel of your application. - Tricky: Basecamp has a cutesy little animation that occurs when you open the modal where the form card stays static, but the form elements within bounce out and back on open very quickly. Try building something like this yourself (you may have to adjust the
display: noneproperty to something else as it doesn’t work well with animation).
I’m only going to implement the autofocus property because I’m the boss around here and get to give the orders. If you don’t care about animation and just want to build the thing, don’t worry about the cute bounce and read on.
Our Form is Utterly Useless
So we have a cool little form that appears and disappears and a static page of pretend projects. Now it’s time to get real.
To actually save a new project in the same way that Basecamp does, we’re going to need a few things (and I want you to try doing it yourself first):
- A
Projectmodel to save / update / delete our projects. To do this, you’ll have to generate a new Rails model and run the created migration. - A new controller action method in our
project_controller.rbfile to handle the creation of a new project and then return a response that will execute some javascript on our users browser. - A new route that will direct a URL with a
POSTrequest to your correct controller action. - The javascript view / response that is returned to the user once the project has successfully been created that will append a new project to our list of projects.
Your Project model should just contain a name and description string for the time being, we’ll add more properties to it later.
If you need a reference on working with Javascript with Basecamp, the official docs are as good as it gets: http://guides.rubyonrails.org/working_with_javascript_in_rails.html.
For your reference, this is how creating a new project looks on Basecamp:
We’re using some Rails remote javascript magic to create the front-end experience here, but if you don’t feel comfortable with javascript yet and want to go the old fashioned route of creating a new project in the Rails CRUD standard, here’s what I want you to do instead:
- Create the same
Projectmodel via the Rails model generator (don’t forget to run the migration too). - Your popover form won’t be a
remoteform, it’ll be a standard form that just sends a regular oldPOSTrequest to one of your routes. - Create a new action method in your
project_controller.rbcontroller, but instead of returning a javascript template to be run, you’ll instead redirect your user to their new project page or re-render theindex.htmlview. - Create a new route for your
POSTrequest, pointing to thecreatecontroller action. - Create the new project dashboard page as just a dummy view for the time being.
Which path should you take? It’s entirely up to you and your skill set at this point.
I’m going to help you go the Javascript path in this tutorial, simply because is refreshingly different from the standard CRUD actions you’ll find in other Rails tutorials (including my own) and it will give you the skill-set to perform fun little actions like this in your future apps.
Either way you decide, give it a go yourself now and read on once you’ve tried your hardest!
Tidying up our Routes
In our rush to ship our new projects index page in Part One, I realised that I hated the route that we chose for our index. Here’s what I’d like you to change your app/routes.rb file to instead, before we move on any further.
Rails.application.routes.draw do
  get 'projects', to: 'project#index'
end
From now on, you’ll be going to localhost:3000/projects in your browser to navigate to your projects index page. With that sorted, lets start building!
Creating our Project Model
First things first, we need to create our project model in order to save anything. If you’re not familiar with Rails ActiveRecord migrations or model generation, now is a great time to read the documentation here: http://guides.rubyonrails.org/active_record_migrations.html.
Let’s generate a model that will create our Project model and table along with two columns, name and description. The Rails model generator will generate:
- A new migration file that will allow us to create the new database table with the columns we ask it for.
- A new model file for our project.
- Some tests for our new model.
Here’s the generator command that you can use via your terminal:
bin/rails generate model Project name:string description:string
Now we have a new migration file that you can check out at db/migrate/_project.rb which is worth looking at (it’s good to know what’s going on):
class CreateProjects < ActiveRecord::Migration[5.1]
  def change
    create_table :projects do |t|
      t.string :name
      t.string :description

      t.timestamps
    end
  end
end
We’re creating a projects table along with name and description string columns and some auto-generated timestamps that are worth keeping. Remember you can edit this file as required and add or remove whatever you’d like.
There’s nothing magical here, just instructions on what we require from our database.
Now, run your Rails migration command to run any outstanding migrations that are waiting:
bin/rails db:migrate
You should see a line of text in your terminal CreateProjects: migrated that confirms how awesome you are.
Controller Methods
Armed with our new Project model, we can do two things:
- Add a
@projectinstance variable to ourindexaction that we can use to generate the appropriate form dynamically. We’ll update our popover form to use this new instance variable. - Create a new
createcontroller action that will be the recipient of the form data that wePOSTto a specific URL. This action should return some javascript that our browser will run.
Try to implement both of these yourself and read on once you’re satisfied with your effort. The Rails documentation is a great resource for everything we’re doing here.
As you move forward, try to keep your browsers Javascript console open to spot bugs as they occur. Remember when debugging that browser / Javascript bugs or logs will appear in your browser console and server-side issues or logs will appear in your Rails server logs within your terminal.
Keep an eye on both if you run into trouble!
First, let’s update our existing index action within the project_controller to pass down a @project instance variable to our view. We’ll use that instance variable for our Rails form helper.
Our updated index action should look like this:
class ProjectController < ApplicationController
  def index
    @project = Project.new
  end
end
Project.new will create a new instance of a Project object without saving anything. We can pass this object to a Rails form helper within our view (app/views/project/index.html.erb), replacing our static form:
<div class="col-md-1 mr-auto">
  <button id="new-project-button" class="btn btn-primary mr-auto">New</button>
  <div id="new-project-popover" class="project-popover is-hidden">
    <%= form_with(model: @project) do |f| %>
      <div class="form-group">
        <%= f.text_field :name, class: "form-control", placeholder: "Name this project", autofocus: true %>
      </div>
      <%= f.submit "Save", class: "btn btn-success" %>
      <button id="cancel-project-popover" class="btn btn-secondary">Cancel</button>
    <% end %>
  </div>
</div>
You can read about what the form_with view helper does here: http://guides.rubyonrails.org/working_with_javascript_in_rails.html#remote-elements.
We now have a form that will POST the form data to /projects via AJAX. To confirm this, you can always inspect your form element in your browser and you’ll see the below:
<form action="/projects" accept-charset="UTF-8" data-remote="true" method="post">
  ...form bits and pieces
</form>
If you do, you’re on the right track! If you don’t, you may have forgotten to update your routes.rb as I mentioned a few paragraphs above.
If you went completely mad and tried to submit your form in it’s current state, you won’t receive any obvious errors, but I assure you, there are errors. If you look in your Javascript Console within your browser of choice, you should see a message:
POST http://localhost:3000/projects 404 (Not Found)
Of course nothing is found for a POST request to /projects, we haven’t implemented it yet. Let’s work our magic now.
First, let’s start with the controller action, which we’ll simply call create. We want it to:
- Attempt to create a new project based on the data it receives.
- Send a response in the form of a javascript file which will then be run in the browser (appending our new project card on our project list in this case).
Here’s how we create our new project in our projects_controller.rb:
def create
  @project = Project.new(project_params)

  respond_to do |format|
    if @project.save
      format.js
    else
      format.json { render json: @project.errors.messages, status: :unprocessable_entity }
    end
  end
end

private

  def project_params
    params.require(:project).permit(:name, :description)
  end
Notice how we created a private method called project_params to filter the parameters we’re receiving from our users? This is a safety precaution that allows us to filter what parameters we expect to receive from our users.
You can see what happens if we don’t use this method by changing the first line of your create method to:
@project = Project.new(params[:project])
If you try to create a project now, the Rails server in your terminal will throw an error complaining about forbidden attributes. Our private project_params overcomes this restriction.
If you did change the @project instance variable line please revert it back to how it’s shown above so that you can proceed error free!
If our project is successfully saved, we’ll return a javascript view (which will be app/views/project/create.js.erb in this case), otherwise, we’ll return some JSON that will list the appropriate error messages and return the correct http status of 422(Unprocessable Entity).
The final piece of this puzzle is to connect our new create controller action to a route in our routes.rb file:
post 'projects', to: 'project#create'
And last but not least, let’s create our app/views/project/create.js.erb file.
For the sake of a very simple test and reinforce what’s happening, let’s just get the javascript to print our our newly created project name to the browser console.
Add this line to your create.js.erb file:
console.log("Project <%= @project.name %> saved like a pro!");
Now it’s time to test it in your browser. If all goes well, you should be able to create a new project and end up with a message in your browser console.
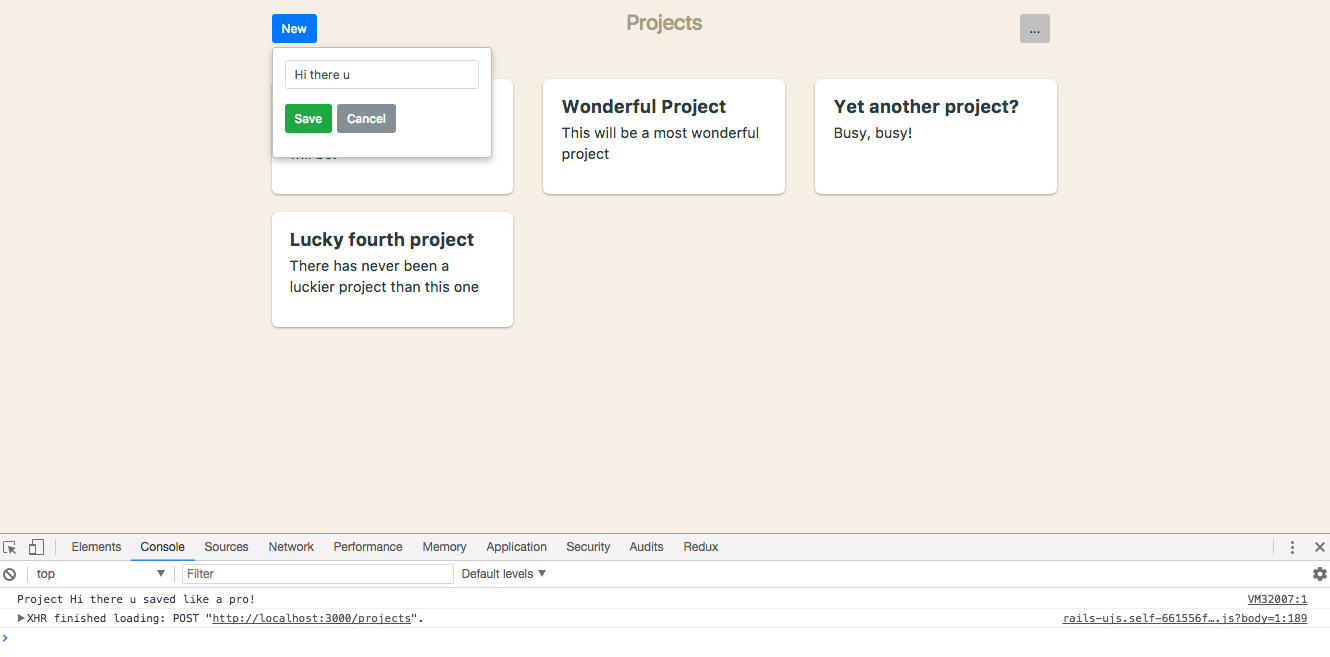
Does the process make sense now?
- Our form sends a
POSTrequest to the/projectspath along with our form data. - Our
createcontroller action receives this data, creates a new project and returns some javascript to the users browser. - The user’s browser runs the returned javascript and in our simple test, prints a message to the console.
Here’s what I’d like you to do. I’d like you to use some javascript to append a new project card (using the html and css we’ve already used for our dummy projects). The new project won’t have a description, but that’s fine (it’s how Basecamp does it!).
Once you’ve worked out how to do that, I’d like to to also clear the new project input field and hide the new project pop over.
Here are some hints:
- At the moment our static projects are all using repetitive html, imagine if we could make our view DRY and render projects using a partial view instead?
- Imagine if we could use that partial view as a part of our returned javascript to render the newly created project?!?!
Good luck! Don’t forget to read the docs and search the Google.
A Project Card Template and Javascript Quirks
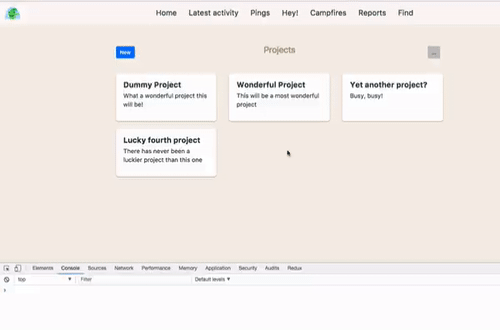
To render our newly created project to our projects list, we’ll first give the div with the home-projects class a unique id. Add the id to this div in your app/views/project/index.html.erb file (I’ve used the id of project-list).
<div id="project-list" class="row home-projects">
  <div class="col-md-4 project-col">
    <a href="#" class="project-card">
      <h4>Dummy Project</h4>
      <p>What a wonderful project this will be!</p>
    </a>
  </div>
  <div class="col-md-4 project-col">
    <a href="#" class="project-card">
      <h4>Wonderful Project</h4>
      <p>This will be a most wonderful project</p>
    </a>
  </div>
  <div class="col-md-4 project-col">
    <a href="#" class="project-card">
      <h4>Yet another project?</h4>
      <p>Busy, busy!</p>
    </a>
  </div>
  <div class="col-md-4 project-col">
    <a href="#" class="project-card">
      <h4>Lucky fourth project</h4>
      <p>There has never been a luckier project than this one</p>
    </a>
  </div>
</div>
Now that we have an element that we can easily identify and append to, let’s update our returned javascript to perform that functionality.
In the app/views/project/create.js.erb file, add the code below. Please read the comments to help you understand what’s happening.
// Assign our project list, project_card view and a new empty div element to variables
var projectList = document.getElementById('project-list')
// Remember, this is an .erb file, so we do have access to Rails helpers in here. We can call the render method to render a partial here with no worries (just don't forget to escape the returned template or you'll bump into errors).
var newProject = '<%= escape_javascript(render "project_card.html", project: @project) %>'
// We have to create a new element in this way in order to get our newProject working as it should. jQuery would avoid this, but where's the fun in that.
var div = document.createElement('div')

// Add our newProject string to the inner html of the empty div we just created
div.innerHTML = newProject

// Append the first child of our div variable (which will be our project card) to our project list
projectList.appendChild(div.firstChild)
We have to create the empty div element and add our project_card template string to it in order to get around some Javascript quirks. If you simply try to append the newProject variable to your projectList, you’ll run into errors (but feel free to try!). This happens because our newProject isn’t a html Node, but we can turn it into one via the div and innerHTML magic we create above.
If your eyes are functioning correctly, you’ll have noticed that we’re rendering a Rails project_card.html partial view as a part of this javascript return.
We’ll need to create this for any of this to work!
Add a new view called _project_card.html.erb to your app/views/project folder. This new view uses the same code that we’re using for our dummy projects on the index, we’ve just made sure that we’re using dynamic data via passed variables where appropriate:
<div class="col-md-4 project-col">
  <a href="#" class="project-card">
    <h4><%= project.name %></h4>
    <% if project.description  %>
      <p><%= project.description %></p>
    <% end %>
  </a>
</div>
Now if the stars align and your copy and paste skills are on point, you should be able to reload your page, create a new project and then have that project appear within your project list!
All we need to do now is to make our project popover disappear and clear the name input’s value.
We’ve successfully hidden the popover by using our .is-hidden class, so let’s implement that functionality within our returned Javascript as well.
In your app/views/project/create.js.erb file, update the code as seen here:
var projectList = document.getElementById('project-list')
var projectPopover = document.getElementById('new-project-popover')
var newProject = "<%= escape_javascript(render 'project_card.html', project: @project) %>"
var div = document.createElement('div')

div.innerHTML = newProject

projectList.appendChild(div.firstChild)
projectPopover.classList.add('is-hidden')
We’re now ready to clear our project name input as well. Let’s go the easy route and add an id to our input within the app/views/project/index.html.erb view. I’ve used the id of project-name-input.
<%= f.text_field :name, class: "form-control", id: "project-name-input", placeholder: "Name this project", autoFocus: true %>
We can now easily access this element from our javascript and empty the value. Finally, update your create.js.erb file one last time as seen here to implement this feature:
var projectList = document.getElementById('project-list')
var projectPopover = document.getElementById('new-project-popover')
var projectNameInput = document.getElementById('project-name-input')
var newProject = "<%= escape_javascript(render 'project_card.html', project: @project) %>"
var div = document.createElement('div')

div.innerHTML = newProject

projectList.appendChild(div.firstChild)
projectPopover.classList.add('is-hidden')
projectNameInput.value = ''
And just like that the functionality will now work as it should.
You can create a new project, and you’ll see it appended to the end of your project list, hiding the new project popover and last but not least, clearing the new project input field.
It’s been a bit of a slog, but you’ve done it!
But Ben, If I Refresh, My Projects Disappear!
Well of course they do you crazy person, have a look at the index action within your project controller as it currently stands:
def index
  @project = Project.new
end
At the moment, the only data our view has access to is the empty project object for our form.
For the moment, let’s assign all of the projects in this application to the @projects instance variable and then do something with that data on our view.
First, update your index action to include the new @projects instance variable:
def index
  @projects = Project.all
  @project = Project.new
end
We’re not always going to want to have every project shown for every user, but for the moment, this is fine.
Having access to the @projects instance variable means that we can now iterate over all of the projects we’ve created thus far and display those instead of our static dummy projects. We’ll leverage our _project_card.html.erb partial view that we created earlier to do this.
Update your app/views/project/index.html.erb as shown here:
<main class="container home">
  <div class="row home-header">
    <div class="col-md-1 mr-auto">
      <button id="new-project-button" class="btn btn-primary mr-auto">New</button>
      <div id="new-project-popover" class="project-popover is-hidden">
        <%= form_with(model: @project) do |f| %>
          <div class="form-group">
            <%= f.text_field :name, class: "form-control", id: "project-name-input", placeholder: "Name this project", autoFocus: true %>
          </div>
          <%= f.submit "Save", class: "btn btn-success" %>
          <button id="cancel-project-popover" class="btn btn-secondary">Cancel</button>
        <% end %>
      </div>
    </div>
    <div class="col-md-4">
      <h3 class="text-center">Projects</h3>
    </div>
    <div class="col-md-1 ml-auto">
      <button class="btn ml-auto">...</button>
    </div>
  </div>
  <div id="project-list" class="row home-projects">
    <% @projects.each do |project| %>
      <%= render "project_card", project: project %>
    <% end %>
  </div>
</main>
We’ve deleted our placeholder projects and we instead iterate over our @projects array and render a project_card partial for each, passing the project as an argument which the partial can then access.
If you refresh your projects index page in the browser now, you’ll see all of the projects you’ve created up until this point:
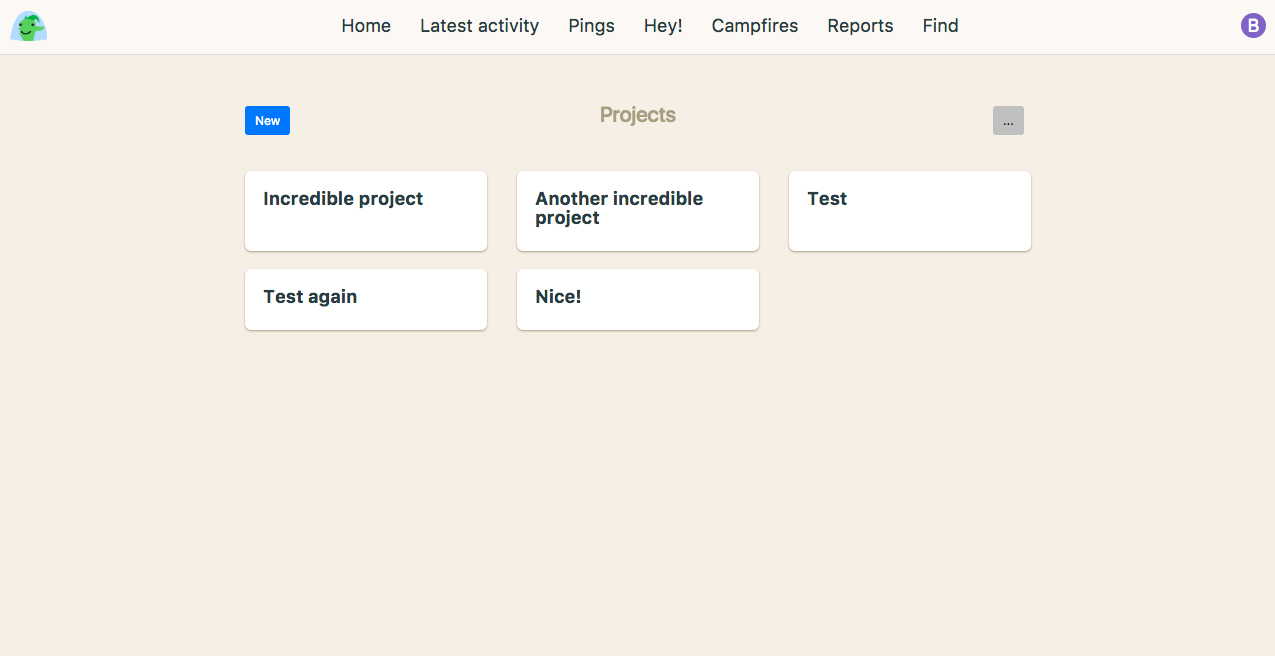
Now if you create a new project, you’ll see it append to the end of the list as it should, but if you were to refresh your page, you’ll notice that all of your projects remain as they should.
There is something that we haven’t done yet though…
Always account for errors!
A mistake I made earlier in my career was to simply assume errors wouldn’t occur…
Ha!
What a fool past-Ben was! Luckily, I now understand the importance of gracefully handling errors in all projects (through a lot of bad experiences unfortunately) and next week, we’ll look at how to handle these errors so that you can learn from my mistakes.
At the moment, our users are also allowed to create projects with empty names or even one or two letters. This is complete madness, so we’ll be sure to fix that in the next part of this series.
What We Achived In Part 2 of our Rails Tutorial
Together over the last 5,000 words, we’ve:
- Created a great little pop-over form using only html, CSS and vanilla javascript.
- We utilised Rails’ built in “remote” form functionality to send form data via a
POSTrequest without refreshing our page. - We learnt how to render a partial view as the result of the javascript we returned to the browser.
- We leveraged our Javascript skills to wipe the form slate clean for the next project we might want to create if we go on a project creating spree.
In Part 3 we’ll not only handle errors from our new project functionality, but we’ll also create the individual dashboards for each project. We’d better make sure we have a way to navigate to those dashboards as well…
Until then my friend!
Ben