Ruby on Rails Tutorial. Let's Build: Basecamp With Ruby on Rails 5.1 - Part 3
12 October 2017
Part Three: Project Dashboards and Error Handling
Did you randomly land on this page, but are looking to learn Ruby on Rails by building fun projects? Start with the beginning of this project right here and start building a Basecamp clone!
Armed with our newly created projects in Devcamp, we can now start to implement the project page for each of our projects! We’re also going to make sure that our sneaky users cannot create a project with no name.
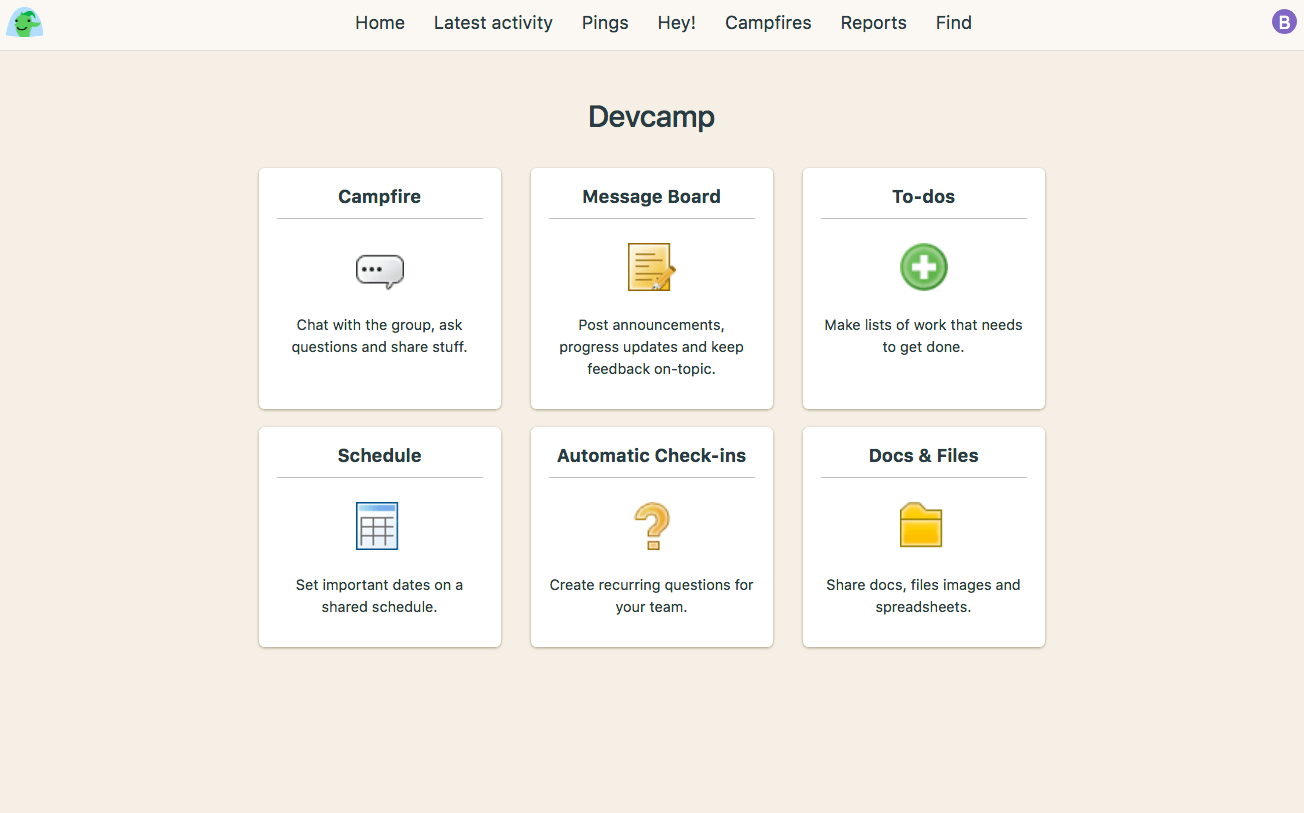
Here’s what our project page will look like by the end of this guide:
Let’s get started!
We want project names!
Allowing our users to create projects with no names is pure insanity, so let’s add a validation to our Project model that requires that our users input a valid name at least one character long.
In your app/models/project.rb file, add your validation:
class Project < ApplicationRecord
  validates :name, presence: true
end
All we’re asking is that a Project record has a name before we save it to the database. Easy!
The issue with this very simple change is that we’re not giving our users any feedback on what has happened, leaving them confused and afraid.
Let’s fix that now!
We have the ability to return error messages from ActiveRecord that we can then use on the front-end to display to our users, but for this particular case, we only have a single validation (the existence of the project name), so let’s hard code the expected error for the time being.
We can identify that something has gone wrong with our project by creating a AJAX listener within our javascript that will listen for the 'ajax:error' event on our form.
Here’s something to try for yourself:
- Open up your
app/assets/javascripts/project.jsfile and within theturbo links:loadlistener I want you to add your new listener. - The listener will look like this:
projectForm.addEventListener('ajax:error', function (xhr, status, err) {
    // Do stuff here
})
- Within that listener I simply want you to
console.logthe different arguments you have access to in the callback function (xhr, status and err). - Can you find the error that ActiveRecord has sent back for us?
- Can you think of a way to use that dynamic error message to display an error to your users?
Do the above now and have a poke around!

Hopefully you found the error message hidden away in the returned xhr object and with that found, you can now disregard it because we’re going to hard-code an error message for the time being.
If you want to create a dynamic error message, please do!
Now, here’s how I’ve created an error message when we receive the ajax:error event on our form. If you have a better solution, please share it below in the comments!
// Handle errors from the project form submission
projectForm.addEventListener('ajax:error', function (xhr, status, err) {
  // Have a good look at what's returned with a console.log()
  console.log(xhr)

  // Add an error class to the project name input
  projectName.classList.add('is-invalid')

  // Create and add our error helper
  var errorNode = document.createElement('div')
  var errorTextNode = document.createTextNode('Name must not be blank')
  errorNode.classList.add('invalid-feedback')
  errorNode.appendChild(errorTextNode)
  // Add the error message node using this ugly line of code. Thanks StackOverflow!
  projectName.parentNode.insertBefore(errorNode, projectName.nextSibling)
})
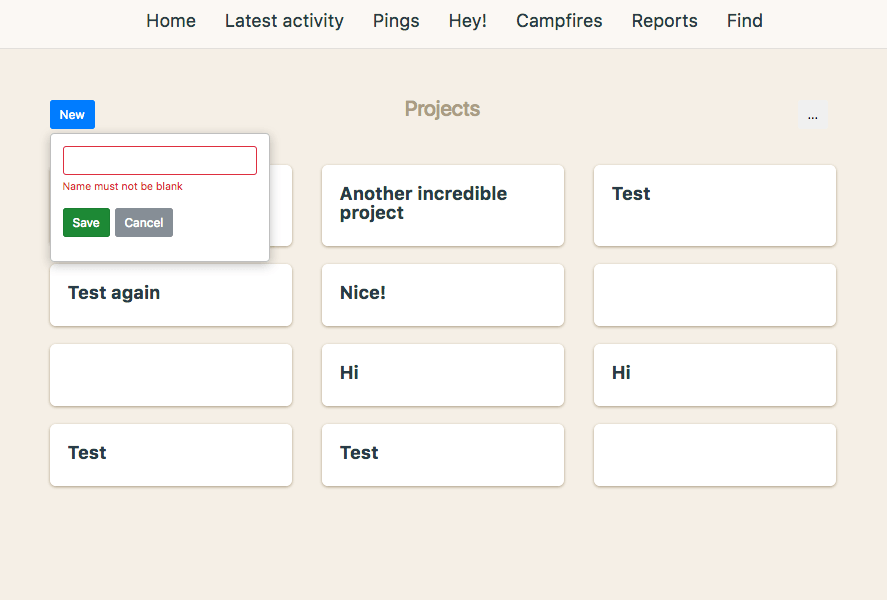
With that code happily sitting in your app/assets/javascripts/project.js file, you should now be getting a nice little error helper when you try to create a new project with an empty name field.
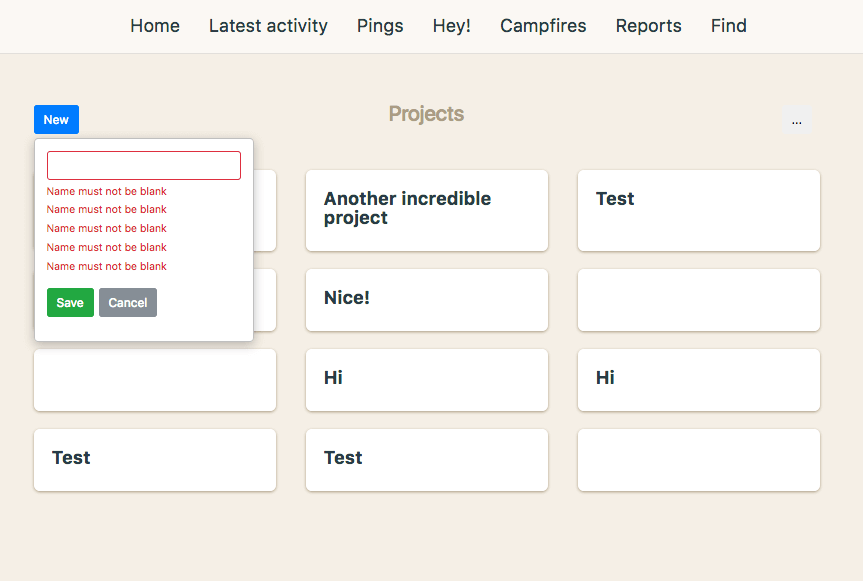
There is an unfortunate side effect of the way we’re currently handling our error event though. Look what happens when we try to submit the form with an empty field multiple times:
Can you fix it? What if you added a unique id to that error message’s surrounding div and checked for its existence prior to adding a new error message?
It’s up to you to make it happen, I’m not going to hold your hand for this one! Go on, fix it up now.
Creating our static Project dashboard
So we have a number of projects that we’ve created but no way to work on those projects as it currently stands. Let’s create a project dashboard page so that we can start that process.
Here’s what I want you to do first though; try it yourself.
Here’s what you’ll need to do:
- Create a new controller action that will handle our new page.
- Create a new view for the dashboard page (just put some dummy text on there for the time being, otherwise try to dynamically show the name of each project).
- Your
app/config/routes.rbfile will need to know about our new controller action and new route if we’re going to display it in the browser as well!
First, let’s create the new controller action that will be responsible for our new view. Let’s just leave it empty for the time being.
class ProjectController < ApplicationController
  def index
    @projects = Project.all
    @project = Project.new
  end

  def create
    @project = Project.new(project_params)

    respond_to do |format|
      if @project.save
        format.js
      else
        format.json { render json: @project.errors.messages, status: :unprocessable_entity }
      end
    end
  end

  # THIS ACTION RIGHT HERE IS NEW
  def show
  end

  private

    def project_params
      params.require(:project).permit(:name, :description)
    end
end
Now that we have the action in place, let’s create the new view with some riveting text to accompany it. This file will be app/views/project/show.html.erb:
<h1>Hello Project!</h1>
Now that we have a new view and controller action, we can tie it all together with a new route for our dashboard view. In your app/config/routes.rb file, add a new line:
Rails.application.routes.draw do
  get 'projects', to: 'project#index'
  # THE BELOW ROUTE RIGHT HERE IS NEW
  get 'projects/:id', to: 'project#show'
  post 'projects', to: 'project#create'
end
Do you notice the :id part of the route string? This allows us to get dynamic when the time calls for it!
Once you’ve completed the above step, simply navigate to a route that follows the below pattern and you’ll see your new view: localhost:3000/projects/literallyanythingcangohere.

Feel free to change that url to /projects/1 or projects/howdy just to prove a point. The :id part of the route simply gives us some dynamic data in our controller action. Here’s one way we could use it…
Let’s update our controller action slightly to access the :id value that’s coming from our router:
def show
  @dynamic_bit = params[:id]
end
And now let’s update our show.html.erb view to also display this dynamic piece of data:
<h1>Hello <%= @dynamic_bit %></h1>
Refresh your page and you should be welcomed with whatever text you popped into your browsers url bar after the /projects/ section!
The above exercise is only to prove a point that nothing magical is happening here. In our use case, we’re going to use that :id parameter to identify the unique id of our users projects and then fetch the record for that project.
In fact, update your code to do this now.
- Change the
@dynamic_bitinstance variable to@project. - Use the
params[:id]parameter as an argument toProject.find()in order to find the correct project. - Armed with your loaded
@projectinstance variable can you display the name of the project at the top of theshow.html.erbpage, instead of our silly placeholder text? - Remember, the controller action is looking for a specific project based on the
idparameter in the route. You’ll have to pop in the number of a project that actually exists in order to test it!
Do your best!
First, let’s update our controller action to better reflect the functionality we actually want. Here’s our updated show action:
def show
  @project = Project.find(params[:id])
end
And now that we can find our project via its unique id, let’s update our show.html.erb template to match:
<h1><%= @project.name %></h1>
In fact, let’s take this moment to add some more structure to our html for this page and pop our heading into the container we also used for our index.html.erb view. Update your app/views/project/show.html.erb file to look like this:
<main class="container home">
  <h1 class="text-center">
    <%= @project.name %>
  </h1>
</main>
It’s all coming together!

Seeing as we already have some legitimate projects that have been created on our index page, let’s dynamically link them up to our new route and view.
Jump into the app/views/projects/_project_card.html.erb file and update the link for each project as shown below:
<div class="col-md-4 project-col">
  <%= link_to(project, class: "project-card") do %>
    <h4><%= project.name %></h4>
    <% if project.description  %>
      <p><%= project.description %></p>
    <% end %>
  <% end %>
</div>
We’re using the Rails link_to helper to create our links, but if you try to refresh your browser now, you should get an error. That’s because we’re using some rails magic when we say link_to(project). Our routes.rb file doesn’t know about a project path yet, so we need to help it along.
Update your app/config/routes.rb file with a simple addition:
Rails.application.routes.draw do
  get 'projects', to: 'project#index'
  get 'projects/:id', to: 'project#show', as: 'project'
  post 'projects', to: 'project#create'
end
The simple addition of as: 'project’ will now allow us to use our route. Remember, if you ever want to list the routes of your project out, jump into your terminal and type:
bin/rails routes
This will list our your routes along with their names and associated controllers and controller actions.
To test your new functionality go back to your index page at localhost:3000/projects and click around on your project cards. Hopefully you’re being taken to each project page and you’re being shown their names at the top of your browser screen.
This is a great time to delete any older projects you may have (especially those who have no name!). You can do that in the Rails console by following along with the below:
# Boot up your Rails console in your terminal
bin/rails console

# Delete all of your existing projects
Project.delete_all
Create another project on your index page just so that we can keep going with our guide!
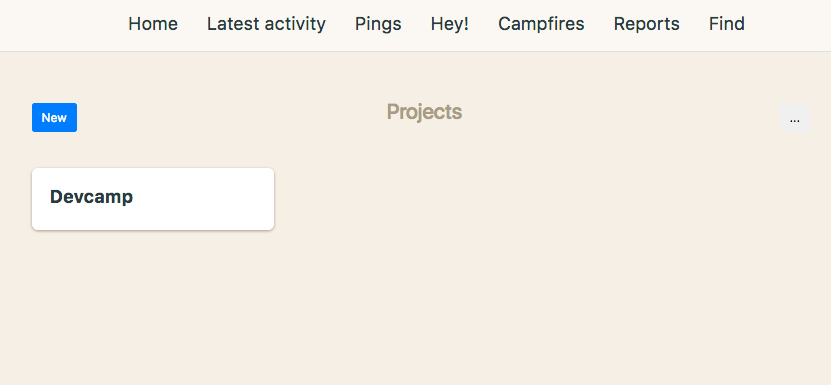
Click on that project and let’s start work on our static Project page.
A Static Project Page
To finish the basic functionality of our new project page, we’ll create some dummy links & functionality for the activities we can perform within a single project.
By the end of this section, you’ll have a page looking like this:
To my eyes, this looks like a great opportunity to use a partial view for each of the ‘cards’ for the features. We’ll simply provide the information for the title, image and description for each feature.
Start by creating our new partial view in app/views/project/_feature_card.html.erb like so:
<div class="col-md-4 feature-col">
  <a class="feature-card" href="<%= feature_link %>">
    <h4><%= title %></h4>
    <img src="<%= image_url(img_src) %>" alt="<%= img_alt %>"></img>
    <p><%= description %></p>
  </a>
</div>
You can clearly see where we’ll have dynamic data fed into our new partial view, allowing us to dynamically add the:
- Link
- Title
- Image Source
- Image alt text
- Feature description
One thing we don’t have yet is some images to illustrate our features. If you’re feeling adventurous you can find your own icons in many different places, but IconFinder is a resource that I like to use. I found my icons from the collection here: https://www.iconfinder.com/iconsets/momenticons-basic.
If you lack imagination, feel free to use the same icons as me by downloading the images from my project repo here and placing them in your app/assets/images folder.
Now, let’s update our app/views/project/show.html.erb view by leveraging our new partial and images:
<main class="container home">
  <h1 class="project-title text-center">
    <%= @project.name %>
  </h1>
  <div class="row">
    <%= render "feature_card", feature_link: '', title: "Campfire", img_src: "campfire", img_alt: "Campfire", description: "Chat with the group, ask questions and share stuff." %>
    <%= render "feature_card", feature_link: '', title: "Message Board", img_src: "message-board", img_alt: "Message Board", description: "Post announcements, progress updates and keep feedback on-topic." %>
    <%= render "feature_card", feature_link: '', title: "To-dos", img_src: "to-do", img_alt: "To-Dos", description: "Make lists of work that needs to get done." %>
    <%= render "feature_card", feature_link: '', title: "Schedule", img_src: "schedule", img_alt: "Schedule", description: "Set important dates on a shared schedule." %>
    <%= render "feature_card", feature_link: '', title: "Automatic Check-ins", img_src: "checkins", img_alt: "Automatic Check Ins", description: "Create recurring questions for your team." %>
    <%= render "feature_card", feature_link: '', title: "Docs & Files", img_src: "docs", img_alt: "Docs and files", description: "Share docs, files images and spreadsheets." %>
  </div>
</main>
You could always get fancy with this information by placing these feature properties into an array of hash objects on the server side and iterating over the contents, but for the sake of simplicity, I’m quite happy to leave it as you see above.
You’ll notice that we have a few new CSS classes in use in the code above and in our new _feature_card partial view, such as:
project-titlefeature-cardfeature-col
The feature-col and feature-card classes share A LOT of similarities with our existing project-col and project-card CSS classes, so let’s make sure they share the same style properties, but let’s also add a few extras for our new feature-card styling.
All we need from our project-title class is a bit of margin below to better space the content on our page. Here’s the updated sections of our app/assets/stylesheets/project.scss file:
.project-title {
  margin-bottom: 3rem;
}

.project-col, .feature-col {
  margin-bottom: 1.5rem;
}

.project-card, .feature-card {
  display: block;
  color: #283c46;
  background-color: #fff;
  box-shadow: 0 1px 2px #aa9c84;
  border-radius: 6px;
  padding: 1.5rem;
  height: 100%;

  &:hover {
    text-decoration: none;
    color: #283c46;
  }

  h4 {
    font-weight: bold;
    margin-bottom: 0.5rem;
  }

  p {
    font-size: 1.2rem;
  }
}

.feature-card {
  h4 {
    text-align: center;
    margin-bottom: 2rem;
    padding-bottom: 1rem;
    border-bottom: 1px solid rgba(0,0,0,0.25);
  }
  img {
    text-align: center;
    display: block;
    width: 48px;
    margin: 0 auto 1rem;
    margin-bottom: 2rem;
  }
  p {
    text-align: center;
  }
}
And now if you refresh your page, you’ll see the final result of your static project page!
Wonderful!
How do we get back?
So we’re happily in a project, but how do we navigate back to our /projects page without manually adjusting our route in the browser url?
How about you quickly update your navbar partial so that clicking on the Home navbar link will take you back to the projects index.
Simply open the app/views/layouts/_navbar.html.erb view and update as per below:
<li class="nav-item">
  <%= link_to "Home", projects_path, class: "nav-link"%>
</li>
Using the Rails link_to helper lets us easily update our previously useless navbar link!
What’s next?
In this smallish article, we implemented some error handling when creating new projects and we also created the static foundation for some of the features we’ll be implementing in the future (full disclosure: we’re not implementing all of these features as a part of this series!).
In the next article, let’s leverage the new Rails 5 Action Cable functionality and create a real-time chat system in our project’s Campfire.
Until then my friend!
Ben