Let’s Build Instagram Part 5 - Liking Larry’s Legs (Step One)
30 October 2015
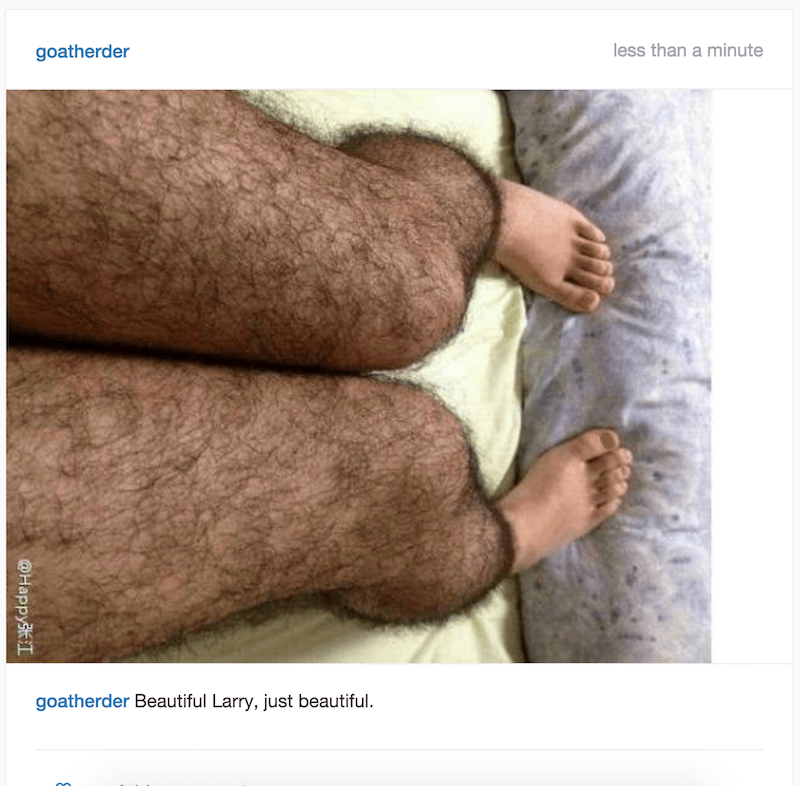
Larry has a spectacular set of pins, check them out:
Larry needs a feature on his favourite social network (Photogram) where he can accumulate likes for his posts, so he can bask in the glory of sharing his lovely legs with the world. And in this Rails tutorial, we’re going to give it to him.
This particular feature will be broken up into two parts due to my new, self-imposed, one article per week rule. Silly me.
But before we continue, here were our previous Rails “Let’s Build” tutorials for Photogram…
Part One - CRUD actions for our posts, each with an image and caption.
Part Two - User functionality with registration and sign-in forms. Also, Adding comments to posts via AJAX.
Part Three - We paginate our posts and comments and also create beautiful registration and login forms
Bonus Guides - The associated testing handbooks for Part One - CRUD & Part Two - Users & Comments.
Tests
As per the last article, tests are optional in these guides, but recommended. I write the tests as the flow of TDD pushes me so having the context of tests may help. Even if you don’t want to test-drive this guide, check out the first part so you can see how we want our new feature to work.
How do we want our likes to work?
- No matter the context that I’m viewing a specific post, I’d like to be able to click a little heart icon under the image to add a ‘like’ to the post.
- Once I’ve liked a post, I’d like to see the ‘like’ count go up and also have my name added to the post’s list of likers.
- My name on the list of likers should link back to my own profile page.
- I want to be able to unlike a post once I’ve liked it, in case I made a mistake.
Perfect. Let’s get these features written down in tests.
We’ll have all of these features in the one spec file due to the pretty simple nature.
Create a new file called spec/features/liking_posts_spec.rb and try to translate our features into Rspec / Capybara.
background do
  # Create a user via factory_girl
  # Create a post for the above user.
  # Visit the root route
end

scenario 'can like a post' do
  # Click the "like" button for the above post.
  # Expect to see a "liked-post" class appear for the button (the button will turn solid red aka Instagram).
  # Expect to see my name within the "liked by" area of the post.
end

scenario 'can unlike a post' do
  # Repeat the above steps.
  # Click the "like" button once more.
  # Expect to see the "unlikes-post" class on the button.
  # Expect to NOT see my name within the "liked by" area of the post
end
Simple, no? Convert it now and run your tests as you go with the rest of the tutorial. Not testing? Ignore all of the above and continue on below (ignore the goat too).

Now, let’s get building.
The button, the likers
Cast your mind back to the comments guide and you should remember that we actually already created a placeholder like button for our users.
The problem is… it is completely useless.
Let’s stop tricking our users and actually make it do something now. This feature will actually be quite familiar to you long time readers, we implemented something very similar for our likes. Here’s how it’ll work technically:
- User clicks on the like button.
- AJAX call is made to a ‘like’ action within the Posts controller.
- The like action increments the likes on the post by one and adds the likers user name to the list of likers for the appropriate post (we’ll use the
acts_as_votablegem for this. - The heart icon for the post will turn solid red (instead of the default).
Try to patch together what you learnt in the previous tutorials. How do we tell that button to make an AJAX call? How do we use jQuery to amend the new user-name to the list of likers for the post and how do we change the icon? Check out the ‘comments’ tutorial for a reminder.
Also, check out the acts_as_votable documents here. They should cover just about everything you could possibly want.
Let’s get building!
First, let’s make sure our heart icon is clickable and also ensure each heart icon has a post-specific id, so we can ensure we’re dealing with the correct post on a page of many posts.
Jump into your app/views/posts/_post.html.haml file and adjust line 24 to 27 to the following:
.comment-like-form.row
      .col-sm-1
        =link_to '', like_post_path(post.id), remote: true,
                                              id: "like_#{post.id}",
                                              class: "glyphicon glyphicon-heart-empty"
All we’ve done is add a post-specific id to each comment area and we’ve also moved our heart icon to the link_to helper itself. We’ve also added the remote: true property to the link, just as we added this same property to our forms in the comments tutorial.
Now, we need to make sure that we’re linking to something useful. Something useful, like our new to be created ‘like’ action in our posts controller.
Jump in the posts controller now and add the new action below your existing destroy action:
def like
end
Now that we have a new action, we’ll need to upgrade our routes.rb file to ensure that our action is accessible to our link_to helper. We’ll make our like action a ‘member’ of the posts collection so we can still access the :id of the post we’re referring to in the url. This will make more sense once we’ve completed it. In your routes file, adjust your posts collection to look like below:
resources :posts do
    resources :comments
    member do
      get 'like'
    end
end
If you were to refresh the dashboard of your Photogram feed and then mouse over the like link now, you should notice the link in the bottom of your browser will point to posts/:id/like which is perfect.
Let’s get the ‘like’ action doing something useful now, let’s make it increment the ‘likes’ of the appropriate post and also, list the user_name of the likers.
It’s time to install the acts_as_votable gem. Add the gem to your gemfile:
gem 'acts_as_votable', '~> 0.10.0'
And run the bundle install command in your terminal.
Once the gem is downloaded and installed, you should be good to continue on this wonderful journey.
As per the acts_as_votable docs, we now need to run a migration to create the voters table.
rails generate acts_as_votable:migration
rake db:migrate
We can now add the acts_as_votable method to the top of our Post model file found at app/models/post.rb. The whole file should now look something like this:
class Post < ActiveRecord::Base
  acts_as_votable

  belongs_to :user
  has_many :comments, dependent: :destroy

  validates :user_id, presence: true
  validates :image, presence: true
  validates :caption, length: { minimum: 3, maximum: 300 }

  has_attached_file :image, styles: { :medium => "640x" }
  validates_attachment_content_type :image, :content_type => /\Aimage\/.*\Z/
end
Fantastic! Now, we can vote on our posts. More specifically, we can like posts!
Sneaky Side-note
This is a fantastic time to play with the new functionality in the rails console, so go ahead and have a play (it’ll make it easier to understand what we’re about to do moving forward). Here’s an example, by just following along with the acts_as_votable docs (this assumes you have at least one user and one post existing on your application).
Run the rails console in your terminal with rails c and then follow along below:
# Creating your first like
user = User.last # Sets the user to a variable
post = Post.last # Sets the post to a variable
post.liked_by user # Creates the like as per the docs

# Let’s count how many likes our post has
post.get_likes.size

# How about who’s liked our post so far?
post.votes_for.up.by_type(User).voters do |voter|
  puts voter.user_name
end
Cool, right? It’s good to play around like this because it makes the functionality concrete in your mind, once it’s time to actually add it to your app. No where were we…
Back to it
Let’s add some substance to our ‘like’ action in our Posts Controller now that we have some useful methods to work with and some knowledge of how they work. Open up the posts controller file and first, make sure you add the ‘like’ action to your set_post before_action at the top of your file:
before_action :set_post, only: [:show, :edit, :update, :destroy, :like]
Now, add the following lines to your ‘like’ action:
def like
  if @post.liked_by current_user
      respond_to do |format|
        format.html { redirect_to :back }
        format.js
      end
    end
end
So what are we doing here? @post.liked_by current_user uses the acts_as_votable gem to cast a vote for the specific post. So, if it works and does indeed vote for the post, we’ll respond with either some javascript or html. In this guide we’ll be responding with some fancy javascript but alas, that will have to wait for Step two of this particular feature build (Once a week articles are killing me!).
Believe it or not, we can now actually like posts! Refresh your Photogram dashboard, or even a single post and click the like button. You’ll be greeted with…. nothing.
Lame. Refresh your page and now see what happens. Oh, ok. Nothing still. Well rest assured that something has in fact happened in the background, it’s just that we don’t have anything in our views to show our likers at the moment.
Let’s fix that now!
Editing our view so we can see who likes you.
That heading rhymes for what it’s worth. Alright, now we have some functionality that let’s us like posts, we just need a way to show these beautiful likes on said posts. First, we’re going to move our whole ‘likes’ section of each post into it’s own partial.
Why?
Well, as a part of the jQuery actions that we’ll get into in the next part of this article, we’ll actually be re-rendering that partial upon liking or un-liking a particular post so that the whole process feels ‘real-time’. It’s also nice to seperate concerns as a part of our application. Our new partial will seem kind of lame, but rest assured, it’s for a good cause.
Jump into your _post.html.haml partial and edit it as below (I’ve included a bit of the surrounding code for context):
.image.center-block
      =link_to (image_tag post.image.url(:medium), class:'img-responsive'),
                 post_path(post)
    .post-bottom
      = render 'posts/likes', post: post
      .caption
        .caption-content
          .user-name
            =link_to post.user.user_name, profile_path(post.user.user_name)
So all we’re adjusting is this line: = render 'posts/likes', post: post. What exactly is that line doing? We’re rendering the ‘posts/likes’ partial. Note, we’ve included the posts directory as a part of this partial render call as we have other views (such as the ‘profile’ view) that aren’t within the ‘posts’ directory. They’ll need some context to find the file.
Also, we’re passing the partial view some context for what post is. post is post.
Time to create our brand new partial view. Create a new file in the ‘app/views/posts’ folder and call it _likes.html.haml.
This new file should look like this:
.likes
  = likers_of post
So we have a div with the ‘likes’ class and we also have this new helper method staring us in the face. Why? It’s nice to keep logic out of our views and we will need some logic to make this look nice.
So I suppose it’s time to create this new helper method!
Navigate over to ‘app/helpers/posts_helper.rb’ and open that bad boy. I’ll show you below what we want inside this file and explain exactly what we’re doing below.
module PostsHelper
  def likers_of(post)
    votes = post.votes_for.up.by_type(User)
    user_names = []
    unless votes.blank?
      votes.voters.each do |voter|
        user_names.push(link_to voter.user_name,
                                profile_path(voter.user_name),
                                class: 'user-name')
      end
      user_names.to_sentence.html_safe + like_plural(votes)
    end
  end

  private

  def like_plural(votes)
    return ' like this' if votes.count > 1
    ' likes this'
  end
end
Quite a lot to take in right? Well, heres that same code again but with some added comments in order for you to make sense of it all:
module PostsHelper
  # Our new helper method
  def likers_of(post)
    # votes variable is set to the likes by users.
    votes = post.votes_for.up.by_type(User)
    # set user_names variable as an empty array
    user_names = []
    # unless there are no likes, continue below.
    unless votes.blank?
      # iterate through the voters of each vote (the users who liked the post)
      votes.voters.each do |voter|
        # add the user_name as a link to the array
        user_names.push(link_to voter.user_name,
                                profile_path(voter.user_name),
                                class: 'user-name')
      end
      # present the array as a nice sentence using the as_sentence method and also make it usable within our html.  Then call the like_plural method with the votes variable we set earlier as the argument.
      user_names.to_sentence.html_safe + like_plural(votes)
    end
  end

  private

  def like_plural(votes)
    # If we more than one like for a post, use ' like this'
    return ' like this' if votes.count > 1
    # Otherwise, return ' likes this'
    ' likes this'
  end
end
Not so bad once you go through it step by step, right?
If you were to once again refresh your dashboard or individual post in your browser, you will now be welcomed with a lovely little ‘like’ area, listing all users who have liked a post (probably just yours). It might look a little strange for the moment though, you’ll need to patch up some css.
Jump into your app/assets/stylesheets/application.scss file and copy the new code in:
@import "bootstrap-sprockets";
 @import "bootstrap";

html {
  height: 100%;
}

body {
  height: 100%;
  background-color: #fafafa;
  font-family: proxima-nova, 'Helvetica Neue', Arial, Helvetica, sans-serif;
}

.alert {
  margin-bottom: 0px;
}

/* ## NAVBAR CUSTOMISATIONS ## */

.navbar {
  margin-bottom: 0px;
}

.navbar-brand {
  a {
    color: #125688;
  }
}

.navbar-default {
  background-color: #fff;
  .navbar-nav li a {
    color: #125688;
  }
}

.navbar-container {
  max-width: 640px;
  margin: 0 auto;
}

/* ## POST CUSTOMISATIONS ## */

.posts-wrapper {
  padding-top: 40px;
  margin: 0 auto;
  max-width: 642px;
  width: 100%;
}

.post {
  background-color: #fff;
  border-color: #edeeee;
  border-style: solid;
  border-radius: 3px;
  border-width: 1px;
  margin-bottom: 60px;
  .post-head {
    flex-direction: row;
    height: 64px;
    padding-left: 24px;
    padding-right: 24px;
    padding-top: 24px;
    color: #125688;
    font-size: 15px;
    line-height: 18px;
    .user-name, .time-ago {
      display: inline;
    }
    .user-name {
      font-weight: 500;
    }
    .time-ago {
      color: #A5A7AA;
      float: right;
    }
  }
  .image {
    border-bottom: 1px solid #eeefef;
    border-top: 1px solid #eeefef;
  }
}

.post-bottom {
  .user-name, .comment-content {
    display: inline;
  }
  .caption {
    margin-bottom: 7px;
  }
  .user-name {
    font-weight: 500;
    color: #125688;
    font-size: 15px;
  }
  .user-name, .caption-content {
    display: inline;
  }
  #comment {
    margin-top: 7px;
    .user-name {
      font-weight: 500;
      margin-right: 0.3em;
    }
    .delete-comment {
      float: right;
      color: #515151;
    }
  }
  margin-bottom: 7px;
  padding-left: 24px;
  padding-right: 24px;
  padding-bottom: 10px;
  font-size: 15px;
  line-height: 18px;
}

.comment_content {
  font-size: 15px;
  line-height: 18px;
  border: medium none;
  width: 100%;
  color: #4B4F54;
}

.comment-like-form {
  padding-top: 24px;
  margin-top: 13px;
  margin-left: 24px;
  margin-right: 24px;
  min-height: 68px;
  align-items: center;
  border-top: 1px solid #EEEFEF;
  flex-direction: row;
  justify-content: center;
}

/* ## Wrapper and styling for the new, edit & devise views ## */

.edit-links {
  margin-top: 20px;
  margin-bottom: 40px;
}

.registration-bg {
  padding-top: 4em;
  height: 100%;
  background-image: image-url('regbackg.jpg');
  -moz-background-size: cover;
  -webkit-background-size: cover;
  -o-background-size: cover;
  background-size: cover;
}

.login-bg {
  padding-top: 4em;
  height: 100%;
  background-image: image-url('loginbg.jpg');
  -moz-background-size: cover;
  -webkit-background-size: cover;
  -o-background-size: cover;
  background-size: cover;
}

.log-in{
  margin-left: auto;
  margin-right: auto;
  text-align:center;
  border: none;
}

.panel {
  border-radius: 8px;
}

.panel-heading{
  h1 {
    text-align: center;
  }
}

#image-preview {
  margin: 0 auto;
}

#post_image {
  padding: 1em;
  margin: 0px auto;
}


#paginator {
  color: #4090DB;
  height: 120px;
  width: 120px;
  margin: 60px auto 40px;
  position: relative;
  display: table;
  border: 2px solid #4090DB;
  border-radius: 50%;
  :hover {
    border: 1px solid #2D6DA8;
    border-radius: 50%;
  }
}

#load_more {
  display: table-cell;
  font-size: 12px;
  padding: 0px 9px;
  vertical-align: middle;
  text-decoration: none;
  a :hover {
    color: #2D6DA8;
  }
}

.comments {
  .paginator {
    margin: 0.5em;
    .more-comments {
      color: #A5A7AA;
    }
  }
}

.comment-submit-button {
  position: absolute;
  left: -9999px;
}

.profile-header {
  padding: 20px 0;
}

.profile-image {
  margin: 20px auto;
  height: 152px;
  width: 152px;
}

.user-name-and-follow {
  display: inline;
}

.profile-user-name {
  display: inline;
}

.edit-button {
  border-color: #818488;
  color: #818488;
  margin-left: 20px;
}

.profile-bio {
  margin-top: 20px;
}

#user_bio {
  border: 1px solid gray;
}

#user_avatar {
  padding: 1em;
  margin: 0px auto;
}

.likes {
  margin-top: 20px;
  margin-bottom: 7px;
}
All I’ve done is added some styling for the ‘likes’ class and also tweaked how the ‘user-name’ class was presented.
Refresh your browser once more and it should look a little nicer.
Now, let’s discuss what we haven’t done in Step One of this feature build, and therefore what we WILL be building in Step Two.
- In order to see our new ‘likes’ for a post, we have to refresh the whole page after clicking the little love heart. This is terrible.
- We have no indication whether our ‘like’ on a post worked or not. The little heart doesn’t turn solid and the likes list isn’t updated.
- We can’t ‘un-like’ a post by clicking the button again.
- Each new like will just add another name to the list of likers. The majority of our screen real-estate will simply be names of likers in huge lists. After a certain point, we just want to show ‘212 likes’, rather than list each of the 212 names.
- Some of our tests are failing now due to some dodgy capybara selectors.
But fear not, brave reader! We will be solving these issues and much, much more (well, maybe not too much) in future guides!
Like this article? It’d be super helpful if you shared it to all your peers as I’m starting to get deleted from Reddit for sharing my articles there on release (apparently I’m a bonafide spammer!). Also, if you haven’t signed up to be notified of each new article, you should do so in the box below now. Your future depends on it (or not).
All the best, you glorious wo / man, chat soon.